Thank you so much for being here. Whether you’re just discovering your love for whimsical cocktails or you’re a seasoned mixologist with a sweet tooth, I’m so excited to share this show-stopping drink with you. The Revenge of the Nerds Cocktail is one of my all-time favorites because it’s colorful, nostalgic, and outrageously fun to make. Inspired by the iconic Nerds candy we all grew up with, this drink is part treat, part cocktail, and 100% unforgettable.
The moment I served this at a birthday bash, it was an instant hit. The vibrant layers, the candy-flavored vodka, and that slushy texture made it more than a drink—it was a party experience in a glass. I promised you versatile, and here’s proof: it works for birthdays, game nights, summer hangouts, or even a cozy movie night when you want to channel your inner kid—with a grown-up twist.
This cocktail features infused vodka, a frozen texture, and an irresistibly layered presentation. And yes, it tastes just like candy. Let’s dive in and learn how to make it step-by-step.
What is the Revenge of the Nerds Cocktail?
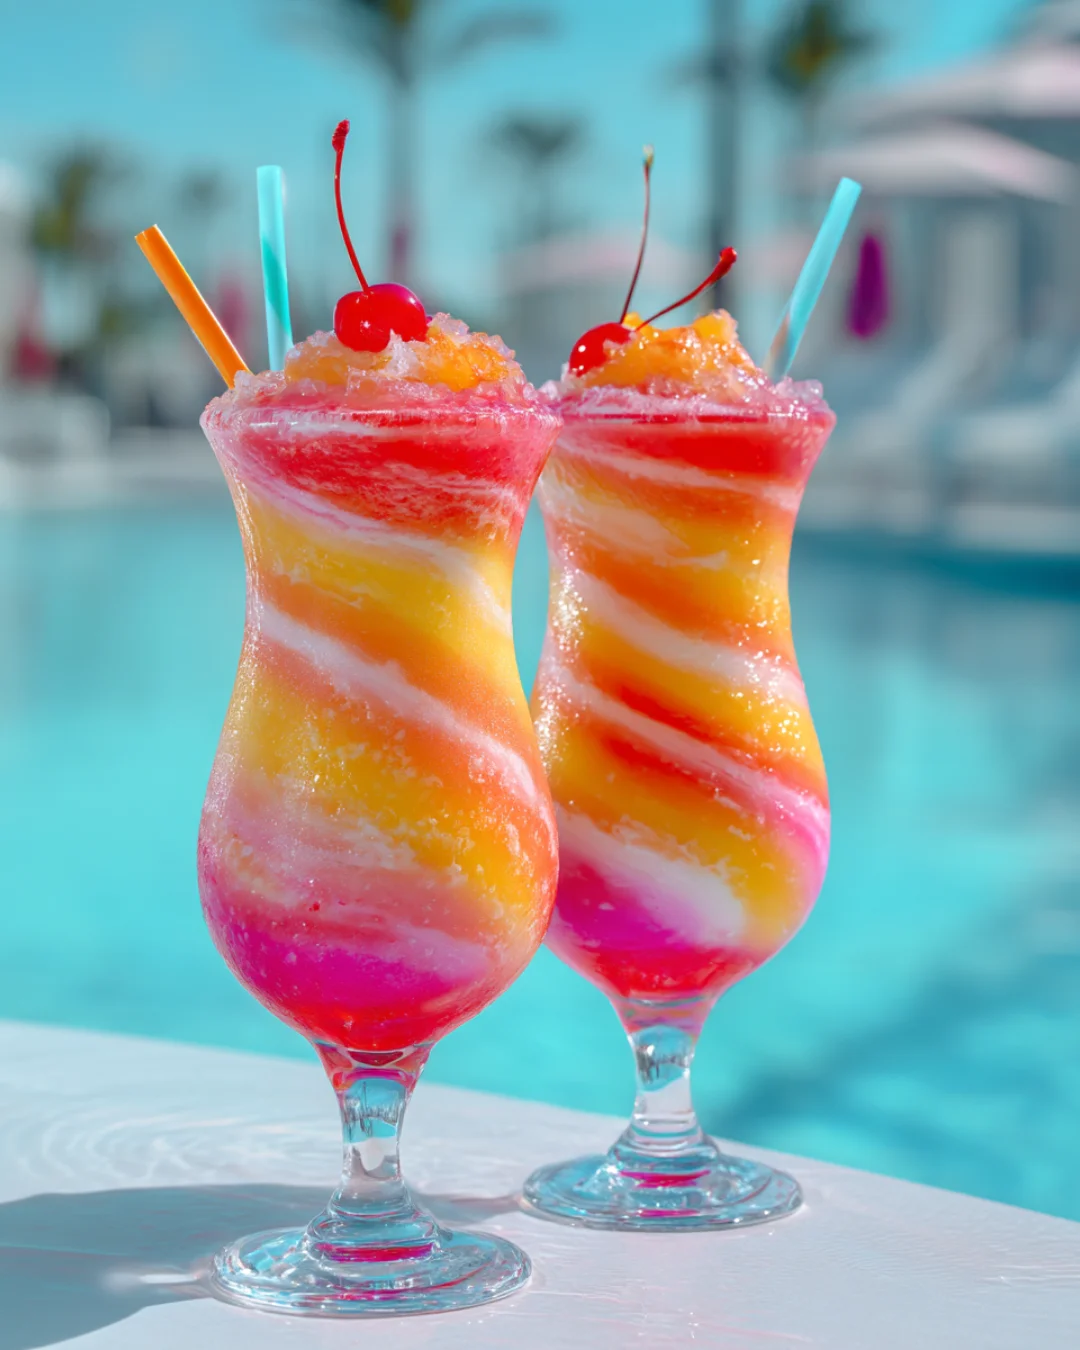
The Revenge of the Nerds Cocktail is a layered, frozen cocktail made with vodka infused with Nerds candy, blended separately into two fruity slushes—one red, one yellow—to create a beautifully stacked, vibrant drink. You’ll taste flavors reminiscent of tropical punch, citrus, and those tangy, tart Nerds candies we all love.
This drink is a guaranteed conversation starter. It’s not just fun to drink—it’s fun to make, fun to serve, and even more fun to customize. You can swap out the colors, flavors, and garnishes to match any theme or personal taste.
Why You’ll Love This Cocktail
It’s hard not to fall in love with a drink that literally tastes like your favorite childhood candy. But the real magic of this recipe lies in the details:
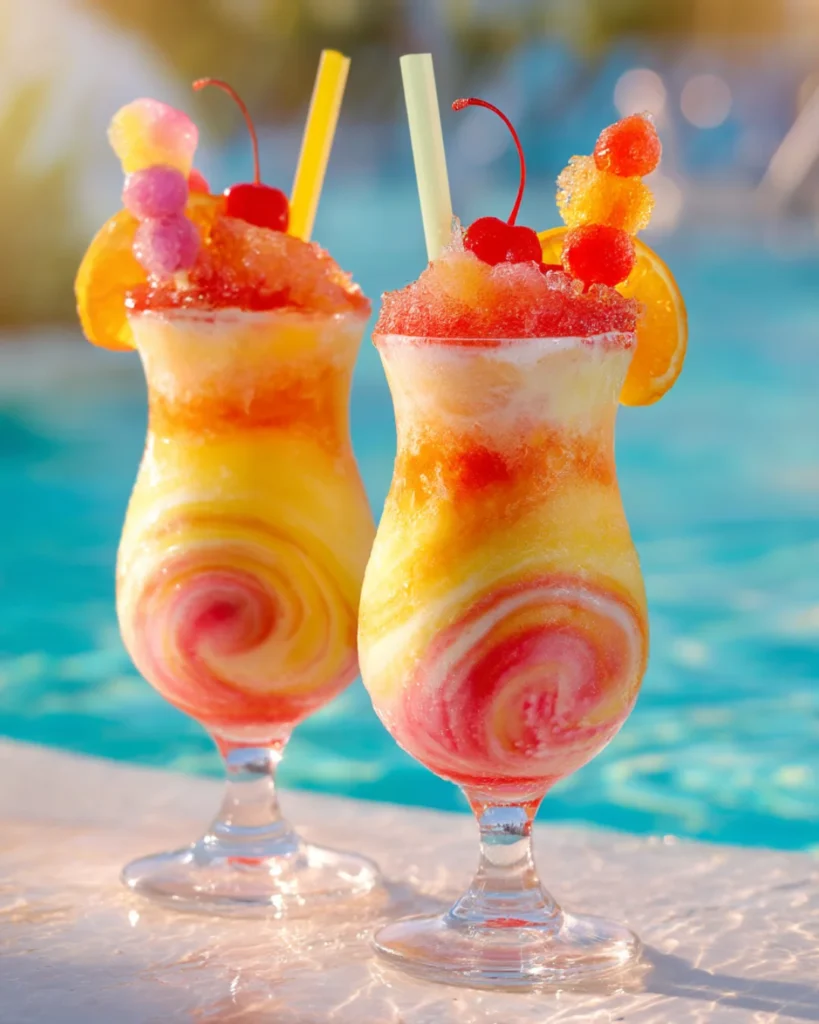
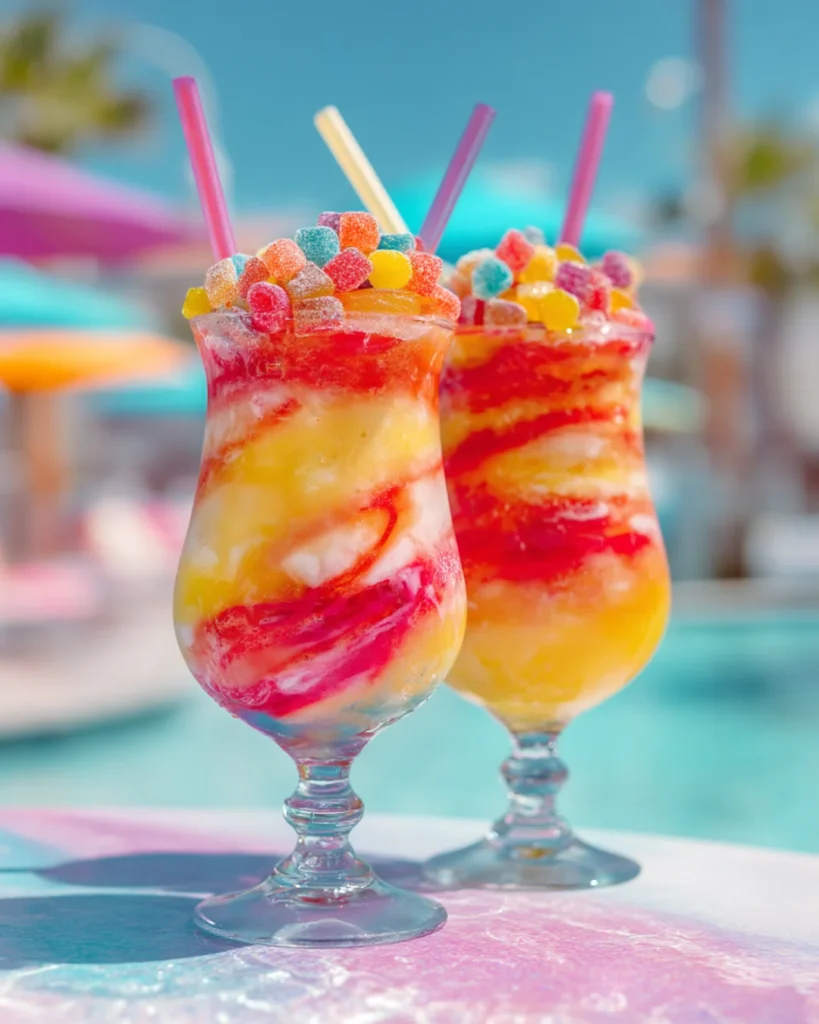
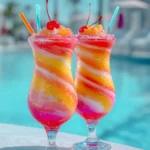
Visually Stunning: That dual-color slush layering turns any glass into a party centerpiece. It looks impressive, but it’s surprisingly easy to pull off with a little patience and a good blender.
Customizable: You’re not locked into red and yellow. Want purple and green? Try grape and apple Nerds. Want blue and pink? Go with blue raspberry and strawberry. The possibilities are endless.
Nostalgic: Candy cocktails tap into a playful side of mixology. This is more than a drink—it’s a throwback in liquid form.
Perfect for Gatherings: Whether you’re hosting a backyard BBQ, a themed birthday, or a 90s movie night, this cocktail fits right in.
Flavorful and Refreshing: Despite being sweet, the tartness of the Nerds and lemonade provides balance, while the icy texture keeps it light and refreshing.
What Does It Taste Like?
Each layer offers a slightly different flavor profile. The red layer is bold and fruity, with tropical notes from the Hawaiian Punch and sweet, berry-forward undertones from the red Nerds. The yellow layer, made with lemonade and yellow Nerds, is bright, citrusy, and a little tangy. Combined, it tastes like a sweet-and-sour frozen punch that keeps your taste buds guessing with every sip.
The vodka infusion captures the tangy-sweet character of Nerds and brings it front and center. If you’ve ever wanted to drink your candy—this is it.
Benefits of the Recipe
- Quick to assemble after prep
- Vodka infusion can be made ahead
- Naturally vibrant without food coloring
- Can be made alcohol-free for kids or non-drinkers
- Scales easily for parties or large batches
- Pairs well with party foods and finger snacks
Ingredients for the Revenge of the Nerds Cocktail
For the Infused Vodka
- ½ cup red Nerds candy
- 1 cup plain vodka
- ½ cup yellow Nerds candy
- 1 cup plain vodka
Soak the candies in separate containers with vodka and let infuse overnight or for at least 8 hours.
For the Cocktail
- 2 oz red Nerds-infused vodka
- 2 oz yellow Nerds-infused vodka
- ½ cup Hawaiian Punch or any red fruit punch
- ½ cup lemonade
- 3 cups ice (1.5 cups per layer)
Garnish Options
- Extra Nerds candy (for the rim or top)
- Maraschino cherries
- Whipped cream
- Festive paper straws or mini umbrellas
Tools You’ll Need
- Two jars or containers with tight lids (for vodka infusion)
- Fine mesh strainer or coffee filter
- High-powered blender
- Measuring jigger or shot glass
- Tall glasses or hurricane glasses
- Long spoons or straws
Ingredient Additions and Substitutions
Feel like experimenting? Here are a few swaps and extras to make it your own:
Swap the Vodka: Use flavored vodka like citrus, raspberry, or whipped cream vodka for added depth.
Alternative Juices: Don’t have Hawaiian Punch? Try cranberry juice or cherry Kool-Aid. For the lemonade layer, limeade or pineapple juice works well too.
Make it Sparkly: Add a splash of lemon-lime soda or sparkling water to each layer after pouring to introduce some bubbles and fizz.
Candy Rim: Rim the glass with corn syrup and dip in crushed Nerds for a textured, colorful presentation.
Fresh Fruit Add-Ins: Blend in a handful of strawberries or pineapple chunks for extra fruity flavor and texture.
Step-by-Step Instructions
1. Infuse the Vodka
Start by dividing your vodka into two jars. Add ½ cup red Nerds to one and ½ cup yellow Nerds to the other. Seal the containers and let sit at room temperature or in the refrigerator overnight. Shake occasionally to help the candy dissolve.
After 8 hours (or overnight), strain the mixtures using a coffee filter or fine mesh strainer to remove any remaining candy particles. You should now have brightly colored, flavored vodkas ready for blending.
2. Make the Red Layer
In a blender, combine:
- 2 oz red Nerds-infused vodka
- ½ cup Hawaiian Punch
- 1.5 cups of ice
Blend until it reaches a thick slush consistency. Carefully pour this into the bottom of each glass. If you want perfectly even layers, use a spoon to guide the pour and minimize splashing.
3. Make the Yellow Layer
Rinse the blender, then combine:
- 2 oz yellow Nerds-infused vodka
- ½ cup lemonade
- 1.5 cups of ice
Blend until smooth and slushy. Carefully pour this on top of the red layer to create the layered effect. Again, use a spoon to help guide the pour if needed.
4. Garnish and Serve
Top each drink with a generous sprinkle of Nerds, a maraschino cherry, or a swirl of whipped cream if desired. Add colorful paper straws and serve immediately.
What to Serve with This Cocktail
This cocktail screams fun, so it pairs best with equally playful foods. Think:
- Mini sliders
- Nachos with bright toppings
- Fruit kabobs
- Cotton candy or popcorn for a movie night
- Mini cupcakes or cake pops
It’s also a great match with other candy-themed cocktails. For a complete party menu, consider adding the Sweet Tart Candy Moonshine, which has a similar nostalgic feel, or serve up a tropical twist with the Frozen Sunrise Margarita. For melon lovers, the Double Melon Bomb adds a refreshing, fruity contrast that balances the sweetness of this cocktail perfectly.
Tips for Perfect Results
Use Crushed Ice: It blends more easily and creates a smoother slush.
Chill Your Glasses: This helps preserve the frozen layers longer.
Clean Blender Between Layers: Don’t skip this step if you want that clean, distinct separation between colors.
Pour Slowly: Especially when adding the second layer. A slow pour over the back of a spoon prevents the colors from mixing.
Serve Immediately: Slush cocktails melt fast. Assemble just before serving for best results.
Make-Ahead and Storage Tips
While this drink is best served immediately after blending, you can prep parts of it ahead.
Infused Vodka: Make it up to a week in advance. Store in an airtight jar in the fridge.
Frozen Slush: It’s tricky to store blended slush without it hardening or separating, but you can freeze it and re-blend with a splash of juice or soda to bring back the right texture.
Leftover Vodka: If you end up with extra infused vodka, mix it with soda water or lemonade for a simpler, still delicious drink.
Frequently Asked Questions
Can I make this drink non-alcoholic?
Absolutely. Substitute the vodka with lemon-lime soda, sparkling water, or a non-alcoholic spirit. The Nerds will still infuse some candy flavor into whatever liquid you choose.
Do I have to use Nerds brand candy?
It’s ideal, but any small, tart hard candy will work in a pinch. Look for something with bright, punchy flavors.
How long does the infused vodka last?
Stored in a sealed container in the refrigerator, it will stay flavorful for up to two weeks. Shake before using if separation occurs.
Can I make this in a large batch?
Yes! Scale up the ingredients and keep each slush layer in the freezer until serving time. Blend again briefly before pouring.
What kind of blender works best?
A high-powered blender like a Vitamix or Ninja will give you the smoothest, most consistent slush texture.
Final Thoughts
The Revenge of the Nerds Cocktail is the ultimate drink for candy lovers, party hosts, or anyone who wants to bring a little color and joy into their cocktail repertoire. From its eye-catching layers to its nostalgic flavors, this drink is guaranteed to delight every guest and bring out your playful side.
It’s proof that cocktails don’t have to be serious to be seriously good. So grab a pack of Nerds, blend up some color, and make your next gathering unforgettable.
More Candy-Inspired Cocktails You’ll Love
- Sweet Tart Candy Moonshine: A tangy, boozy treat that’s great for gifting or sipping.
- Frozen Sunrise Margarita: A layered, citrusy slush with tropical vibes.
- Double Melon Bomb: Watermelon and melon liqueur combine in this vibrant, refreshing drink.
Join the Fun
Tried this recipe? I would absolutely love to see your creations! Leave a review, tag me on Pinterest, or share a photo of your own Revenge of the Nerds Cocktail setup. Your version might just inspire someone else to give it a try.
Approximate Nutritional Info (Per Serving)
- Calories: 250
- Carbohydrates: 35g
- Sugars: 32g
- Alcohol: Approximately 1.5 oz vodka
- Fat: 0g
- Protein: 0g
Revenge of the Nerds Cocktail: A Candy-Crazed Frozen Party Drink
Description
A frozen, layered cocktail that tastes just like your favorite childhood candy! The Revenge of the Nerds Cocktail blends Nerds-infused vodka with fruity slush layers of Hawaiian Punch and lemonade for a colorful, party-ready drink. Sweet, tart, and totally nostalgic—this drink is perfect for birthdays, summer get-togethers, or anytime you want to turn heads. It’s as fun to make as it is to sip. Try it at your next gathering and wow your guests with every neon swirl!
Ingredients
For the Nerds-Infused Vodka:
-
½ cup red Nerds candy
-
1 cup plain vodka
-
½ cup yellow Nerds candy
-
1 cup plain vodka
For the Cocktail:
-
2 oz red Nerds-infused vodka
-
½ cup Hawaiian Punch (or any red fruit punch)
-
2 oz yellow Nerds-infused vodka
-
½ cup lemonade
-
3 cups ice (divided into two batches of 1.5 cups each)
Optional Garnishes:
-
Extra Nerds candy (for topping or rimming the glass)
-
Maraschino cherries
-
Whipped cream
-
Fun paper straws or cocktail umbrellas
Instructions
-
Infuse the Vodka
In two separate jars, combine ½ cup red Nerds with 1 cup vodka and ½ cup yellow Nerds with 1 cup vodka. Seal and let sit for at least 8 hours or overnight. Shake occasionally to help dissolve the candy. Once infused, strain both mixtures through a fine mesh strainer or coffee filter. -
Blend the Red Layer
In a blender, combine 2 oz of red Nerds vodka, ½ cup Hawaiian Punch, and 1.5 cups of ice. Blend until slushy and pour into the bottom of tall glasses. -
Blend the Yellow Layer
Rinse the blender. Add 2 oz of yellow Nerds vodka, ½ cup lemonade, and 1.5 cups of ice. Blend until slushy and carefully pour over the red layer to create a colorful, stacked effect.
-
Garnish and Serve
Top each glass with whipped cream, cherries, and a sprinkle of Nerds if desired. Add straws or cocktail umbrellas and serve immediately. Cheers!
Notes
-
Chill your glasses ahead of time to keep the slush frozen longer.
-
Want different colors? Use other Nerds flavors like grape or blue raspberry for even wilder combos.
-
No alcohol? Use lemon-lime soda or sparkling water in place of vodka for a fun mocktail version.
-
Leftover infused vodka keeps well in the fridge for up to 2 weeks—use it to mix into lemonade, soda, or iced tea for quick candy-inspired sippers.
-
Layering tip: Pour the second layer slowly over the back of a spoon to avoid mixing colors.