

Crafting your very own Dinosaur Night Light DIY is like unlocking a magical doorway to the past—where prehistoric creatures light up your nights in glowing wonder! Whether you’re a crafty parent, a creative teacher, or just love dinosaurs, this delightful project blends fun, learning, and a little bedtime magic all in one.
Forget boring night lights! These Jurassic-inspired jars are sensory-rich, easy to make, and an engaging activity for kids and adults alike. Let’s illuminate your path to dino discovery!
Why Dinosaur Night Lights Are the Perfect Craft
Combining imagination and hands-on creativity, dinosaur night lights check all the boxes:
- Educational: Teach kids about ancient creatures while building something cool.
- Sensory-friendly: Lights, textures, and colors engage multiple senses.
- Calming: A soft glow helps ease bedtime fears and builds routine.
- Decorative: A stylish yet playful addition to any child’s room or themed party.
Whether it’s a rainy day activity or birthday project, this DIY will be a roaring success!
Materials You’ll Need
To create your glowing dino habitat, gather these items:
| Item | Description |
|---|---|
| Mason jar or clear plastic jar | With lid; size depends on figure size |
| Small plastic dinosaur figures | Choose favorites like T-Rex, Triceratops, etc. |
| LED string lights or tea lights | Battery-operated preferred for safety |
| Decorative moss and rocks | For ground cover and terrain |
| Hot glue gun and glue sticks | For attaching elements inside and outside |
| Optional: Paint, glitter, stickers | To customize lid and exterior decoration |
Optional extras: sand, tiny palm trees, glow-in-the-dark paint, fairy lights.
Step-by-Step Guide to Making a Dinosaur Night Light
Let’s get crafting! Follow these easy steps:
Step 1 – Choose the Right Jar
Select a mason jar for a classic look or a durable plastic jar for kid-friendliness. Make sure it’s wide enough to arrange your mini dino-scene.
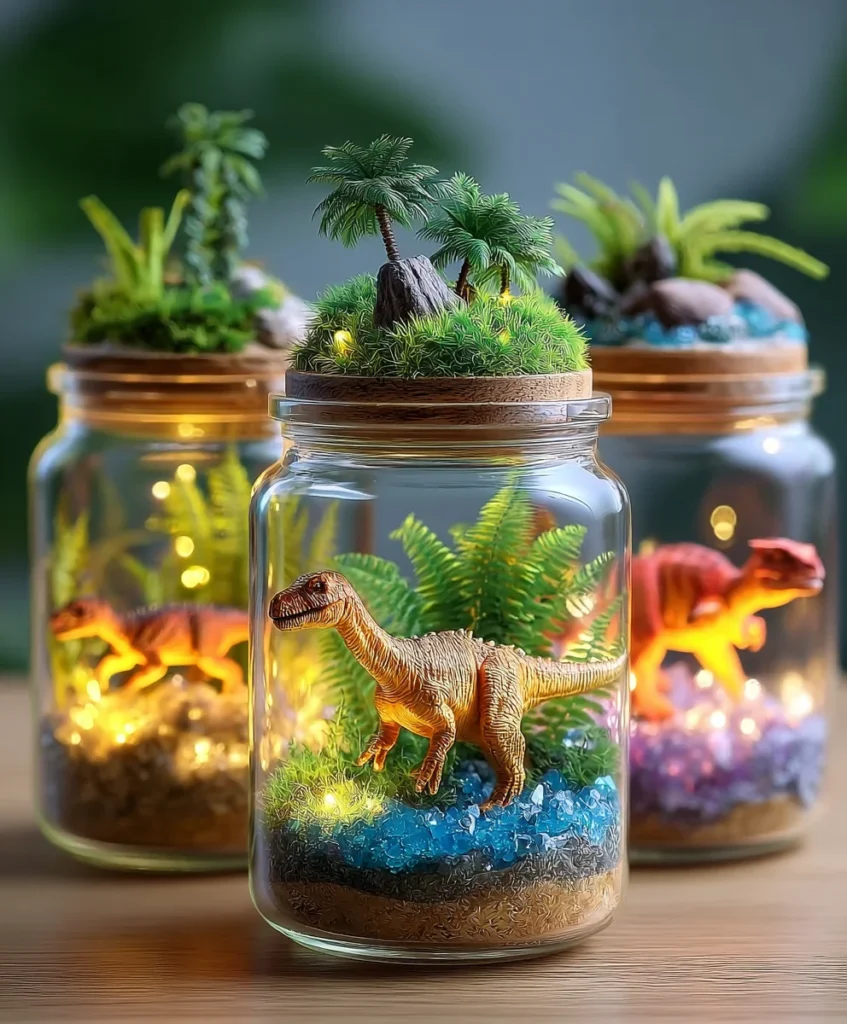
Step 2 – Add the Landscape Base
Layer decorative moss, pebbles, faux plants, or sand to mimic a prehistoric jungle or desert.
Pro Tip: Mix textures for a more realistic environment.
Step 3 – Position the Dinosaur Figures
Glue your dinos in action poses—fighting, exploring, or standing guard. Arrange them before attaching permanently to ensure a balanced look.
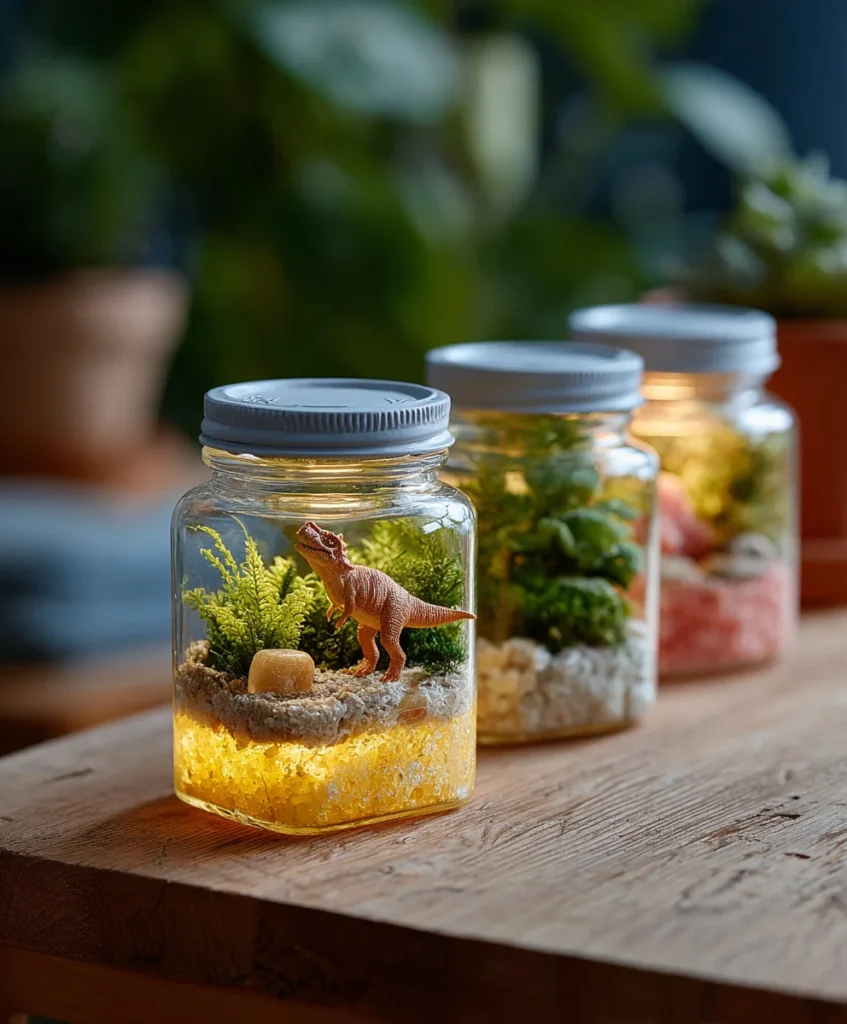
Step 4 – Install the Lights
Coil LED fairy lights around the base or use tea lights hidden under moss. If using a switch-operated light, glue it to the underside of the lid for easy access.
Step 5 – Seal and Decorate the Jar Lid
Paint the lid like lava or jungle canopy, and optionally add mini trees, rocks, or even more dinos on top!
Safety Tips for Kids and Parents
- Always supervise with hot glue guns.
- Use battery-operated lights only—no open flames.
- Avoid tiny pieces with children under 3.
Safety first makes the craft stress-free and fun for everyone!
Educational Benefits of This Craft
The Dinosaur Night Light DIY isn’t just fun—it’s packed with learning opportunities:
- STEM concepts: Understand electricity (LEDs), basic circuitry, and how light works.
- Creative storytelling: Kids can invent Jurassic tales based on their glowing jar scenes.
- Sensory development: Handling textures, lights, and shapes stimulates young minds.
- Dinosaur knowledge: Learn names, facts, habitats, and behaviors of prehistoric creatures.
It’s a hands-on way to turn curiosity into discovery!
Best Age Range and Supervision Needs
| Age Group | Involvement Level | Supervision Required? |
|---|---|---|
| 3–5 years old | Observing and light decorating | Yes, close supervision |
| 6–8 years old | Can arrange items, place dinosaurs | Yes, for glue and lights |
| 9–12 years old | Mostly independent crafting | Light supervision suggested |
| 13+ | Full DIY with optional customization | Minimal supervision needed |
Always tailor tasks based on your child’s abilities and interest!
Dinosaur Night Light Variations to Try
Feeling creative? Here are some cool variations:
- Lava Lamp Volcano Scene – Add red/orange lights, lava rocks, and a volcano model.
- Frozen Dinosaur World – Use fake snow, blue lights, and ice-age animals.
- Dino Jungle Jar – Add vines, lots of greenery, and multiple small dinos.
- Glow-in-the-Dark Paint Accents – Paint trees or dinos to shine after lights go off.
- Galaxy Dino Dome – Paint stars inside the lid and use purple or blue LEDs.
The possibilities are endless!
Where to Buy Supplies Online or Locally
You don’t need rare materials! Try:
- Amazon – One-stop shop for kits, dinosaurs, and LEDs.
- Walmart – Budget-friendly toys and craft items.
- Michaels / Hobby Lobby – Great for decorative elements like moss and rocks.
- Dollar Stores – Hidden treasures at low cost.
- Local craft stores – Support local businesses while picking up essentials.
Always compare prices and check for multi-packs for parties or classrooms!
Tips for Hosting a Dino Night Light Party
Make this craft the highlight of your next get-together! Here’s how:
- Set up stations: Jar, landscape, figures, lights.
- Pre-cut moss and prepare glue guns for safety.
- Offer multiple dinosaur types to let kids choose their favorite.
- Play dinosaur soundtracks for ambiance.
- Provide take-home bags so kids can proudly show off their night light.
Great for birthdays, sleepovers, or classroom activities!
How to Incorporate It into Bedtime Routines
Once the light is made, use it to ease bedtime transitions:
- Turn off room lights and use only the jar—instantly calming.
- Tell a dinosaur bedtime story related to the scene inside.
- Name the dinosaurs and describe their “nighttime adventures.”
- Make it a reward system: “Let’s turn on your dino light after brushing teeth!”
A bedtime ritual that glows with imagination!
Long-Term Care and Maintenance
Keep your Dinosaur Night Light DIY glowing for weeks or even months:
- Dust the inside using a small brush or air blower.
- Replace batteries monthly if used nightly.
- Check glue strength and re-glue any loose figures.
- Keep away from direct sunlight to prevent fading.
- Store upright to protect interior landscapes.
Proper care means lasting magic!
FAQs About Dinosaur Night Light DIY
1. Is this safe for toddlers?
It can be! Use plastic jars, skip small choking hazards, and supervise during assembly.
2. How long do the lights last?
LED string lights can last 24–48 hours continuously. With nightly use, 2–3 weeks per battery set is typical.
3. Can I use a regular night light bulb?
No, it’s best to use battery-operated LEDs to avoid heat and fire risks.
4. What size dinosaurs work best?
1–3 inch figures fit nicely. Larger figures may crowd the jar or make it top-heavy.
5. Can I reuse materials?
Yes! Repaint dinosaurs, replace lights, or refresh moss to give the jar new life.
6. Can we make this a school project?
Absolutely. It’s perfect for science fairs, art days, or dinosaur unit studies.
Conclusion: Light Up the Night With Roars of Joy
The Dinosaur Night Light DIY isn’t just another craft—it’s a glowing invitation to enter the world of the dinosaurs, one night at a time. It’s a learning experience, a decorative piece, and a soothing bedtime buddy all rolled into one.
So grab your jar, let your creativity loose, and bring a dino world to life—because nothing says “sweet dreams” like a glowing T-Rex standing watch.