

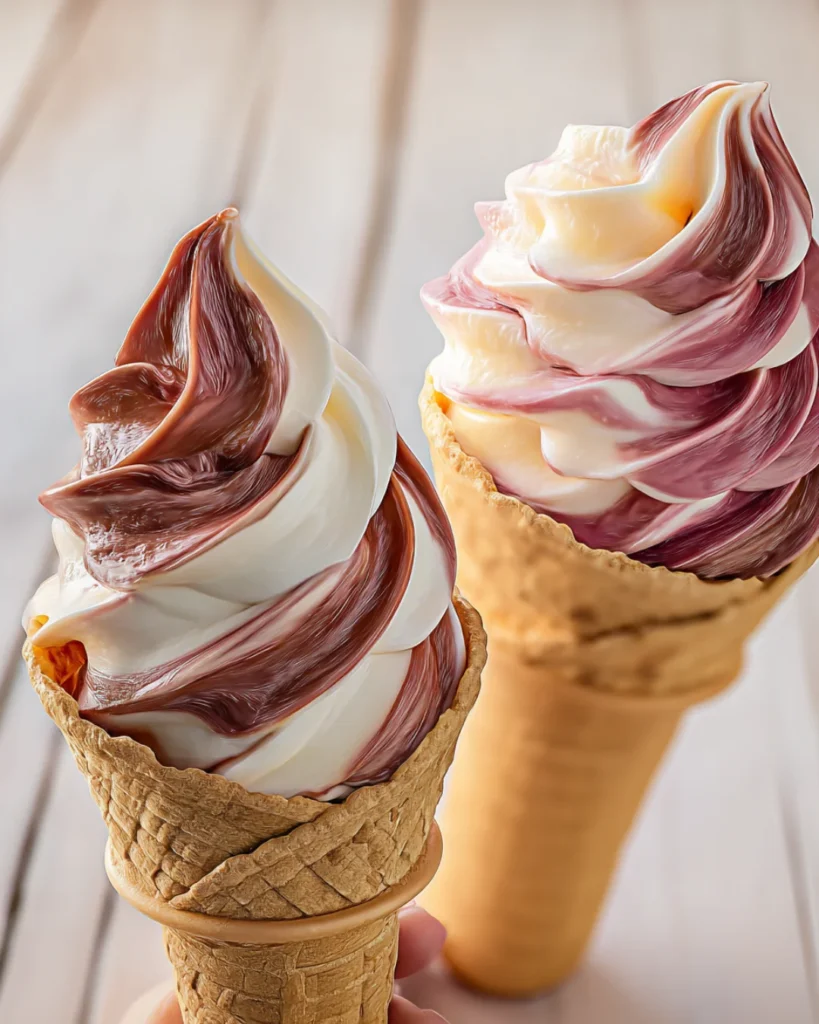
If you’re anything like me, you’re always on the lookout for something nostalgic, comforting, and just a little unexpected when it comes to dessert. That’s exactly what this Dr Pepper Ice Cream (No-Churn Swirl) brings to the table. It’s creamy, velvety, and full of those unmistakable 23 flavors that make Dr Pepper so iconic—all wrapped up in an easy, no-churn method that doesn’t require an ice cream maker. It’s soda-shop magic in a bowl, and I can’t wait for you to try it.
What Is Dr Pepper Ice Cream (No-Churn Swirl)?
This no-churn Dr Pepper ice cream is a unique spin on the soda-fountain desserts of the past. We’re using a tried-and-true method: whipped cream and sweetened condensed milk as the ice cream base. No eggs, no cooking custards, and no fancy machines. What sets this recipe apart is the homemade Dr Pepper reduction—a thick, sticky syrup made by simmering down the soda with a bit of brown sugar. That syrup gets swirled into the creamy base to create ribbons of cola-inspired depth throughout.
The result? A luxurious frozen dessert that balances sweetness, nostalgia, and that enigmatic Dr Pepper flavor in every bite.
Why You’ll Fall in Love with This Recipe
There’s something about soda-inspired desserts that tugs at childhood memories while offering something totally new. This recipe is no exception. Here’s why you’ll keep coming back to it:
- No Ice Cream Maker Required: No-churn means anyone can make this—no special equipment, no stress.
- Full-Flavored and Fun: The Dr Pepper swirl provides a complex, almost spiced flavor contrast to the sweet vanilla base.
- Make-Ahead Friendly: Perfect for prepping the night before a BBQ, birthday party, or long weekend gathering.
- Totally Customizable: Add cherries, chocolate chips, or a swirl of cherry syrup for a float-style twist.
This dessert really hits the sweet spot between simple and sensational.
What Does It Taste Like?
Imagine the classic vanilla ice cream base that’s rich and luscious—but not too sweet. Now add a ripple of soda that’s been cooked down to enhance its natural caramel, cherry, and spice notes. The Dr Pepper reduction weaves through each scoop with bold flavor, offering hints of molasses, cola, prune, clove, and cherry that give this ice cream surprising depth.
Each bite is creamy and soft, but it also has those thick little veins of syrup that feel almost like a fudge ripple—but lighter and more aromatic.
Health and Practical Benefits
- No Added Artificial Flavors: You’re using real soda, not a cola-flavored extract or syrup.
- No Eggs or Cooking Required: Safe and simple for beginner cooks or younger helpers.
- Flexible Portions: You can easily double the recipe or scale it down for smaller gatherings.
- Make It Your Own: You can lean into the spice, fruitiness, or vanilla depending on your flavor preferences.
Ingredients You’ll Need
For the Dr Pepper Reduction:
- 2 cups Dr Pepper (use the original, not diet)
- 2 tablespoons brown sugar (light or dark, your choice)
- Optional: 1 teaspoon vanilla extract or a pinch of cinnamon for a spiced twist
For the No-Churn Ice Cream Base:
- 2 cups cold heavy whipping cream
- 1 (14-ounce) can sweetened condensed milk
- 1 teaspoon pure vanilla extract
Tools Needed
- Medium saucepan for the reduction
- Hand or stand mixer
- Two mixing bowls (one large, one medium)
- Rubber spatula
- Loaf pan or freezer-safe container
- Knife or skewer for swirling
- Plastic wrap or wax paper for covering
Optional Add-Ins and Variations
The base recipe is incredibly satisfying, but there’s plenty of room to make it your own.
Add-Ins:
- Maraschino cherries: Add a handful, chopped, to the vanilla base for a retro soda-fountain vibe.
- Mini chocolate chips: Adds a little texture and pairs surprisingly well with the cola flavor.
- Crushed graham crackers: For a float-inspired finish or to evoke soda shop pie sundaes.
Substitutions:
- Cherry soda or root beer can replace Dr Pepper if you want to change up the soda note entirely.
- Maple syrup or honey instead of brown sugar in the reduction will alter the profile subtly.
- Almond extract instead of vanilla if you want a nuttier background note.
How to Make Dr Pepper Ice Cream (No-Churn Swirl)
Step 1: Create the Dr Pepper Reduction
In a medium saucepan, combine 2 cups of Dr Pepper with 2 tablespoons of brown sugar. Bring it to a simmer over medium heat, stirring occasionally. After 20 to 25 minutes, the mixture should be reduced by at least half and have a thick, syrupy consistency. If using, stir in the vanilla extract or cinnamon once it’s off the heat. Let the syrup cool completely before using.
This step intensifies the soda’s natural flavors. Don’t rush the cooling—it’s essential to avoid melting your whipped cream later.
Step 2: Whip the Cream
Using a chilled bowl and beaters, whip the cold heavy cream until stiff peaks form. This will take about 3 to 4 minutes with a hand mixer on high speed.
Step 3: Combine the Base
In a separate bowl, mix the sweetened condensed milk with the vanilla extract. Gently fold the whipped cream into the sweetened condensed milk mixture, one-third at a time. Use slow, folding motions to maintain the airiness of the whipped cream.
Step 4: Assemble and Swirl
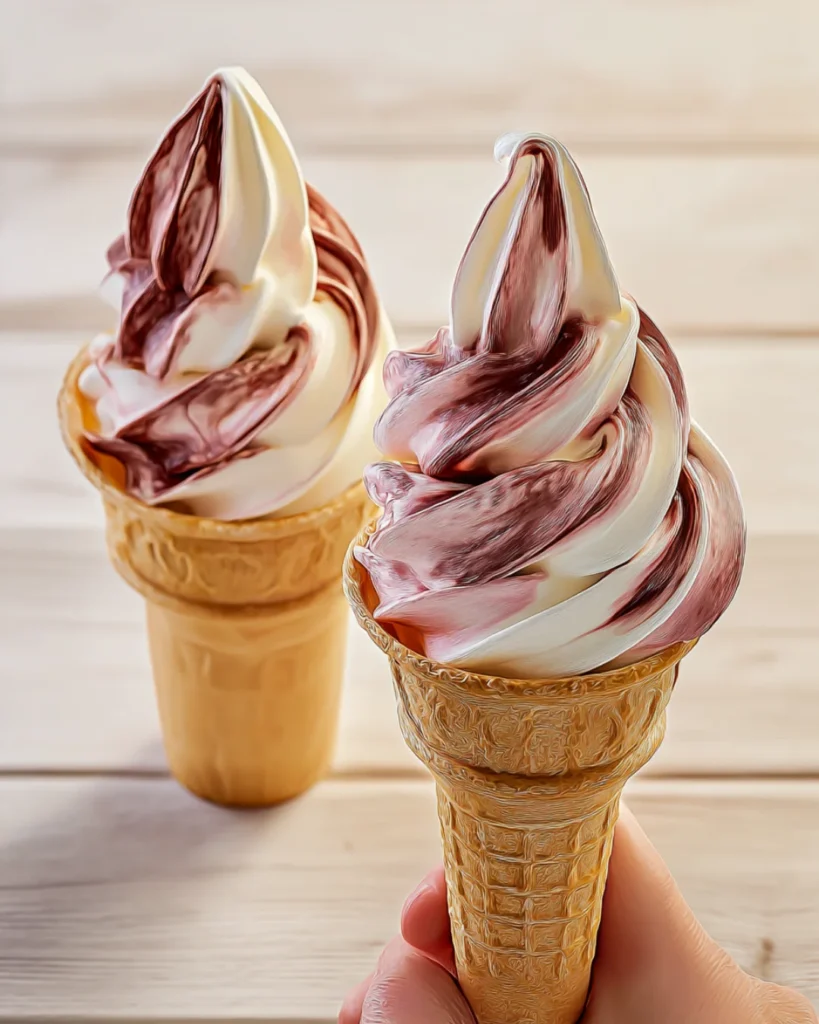
Pour half of the vanilla ice cream mixture into your container. Drizzle over a few spoonfuls of the cooled Dr Pepper reduction. Repeat with the remaining ice cream base and the rest of the syrup. Use a knife to gently swirl the reduction throughout without overmixing.
The goal is to create visible streaks and ribbons, not to blend everything uniformly.
Step 5: Freeze
Cover the container tightly with a lid or press plastic wrap directly onto the surface. Freeze for at least 6 hours or until firm. Overnight is best for optimal scooping consistency.
What to Serve With Dr Pepper Ice Cream
This ice cream is flavorful enough to enjoy solo, but it also plays well with others. Try pairing it with:
- Chocolate brownies: Fudgy, warm brownies topped with this ice cream = dessert heaven.
- Waffle cones: The classic soda shop feel, elevated.
- Pretzels or peanuts: A salty crunch for contrast.
- Cherry sauce or hot fudge: For that decadent sundae effect.
Expert Tips
- Chill your mixing bowl and beaters before whipping the cream—it makes the process faster and helps with texture.
- Don’t overmix the swirl. You want those dramatic ribbons for flavor and visual appeal.
- Use regular Dr Pepper, not diet, for best syrup results. Artificial sweeteners don’t reduce well.
- Add a pinch of salt to the vanilla base if you prefer a more balanced, less sweet result.
How to Store
Store the finished ice cream in an airtight container in the freezer for up to 2 weeks. For best texture, press a piece of wax paper or plastic wrap directly against the surface before sealing the lid. Let the container sit at room temperature for 5 to 10 minutes before scooping.
The Basics of No-Churn Ice Cream
This technique skips eggs and churners in favor of whipped cream and sweetened condensed milk. The air from the whipped cream gives the ice cream its light texture, while the condensed milk keeps it scoopable and soft—even when frozen solid.
No-churn ice cream is perfect for beginners and a favorite for anyone who likes quick wins in the kitchen. Once you try this method, you’ll probably want to create your own custom swirls. And lucky for you, I’ve got more ideas ready to go!
Related Recipes You’ll Love
If soda-shop-inspired or fruity swirled ice creams are your jam, you’ll absolutely want to try these too:
- Strawberry Swirl Cone Recipe: A bright, fruity twist in cone form, perfect for summer afternoons.
- Starburst Ice Cream (No-Churn): Candy-inspired and explosively colorful, this one’s for the sweet tooth in all of us.
- Mango Strawberry Ice Cream (No-Churn): Tropical fruit meets silky cream—an easy way to escape to flavor paradise.
Frequently Asked Questions
Can I use diet Dr Pepper?
It’s not recommended. Diet sodas usually don’t reduce well and won’t create that thick, syrupy texture you need for swirling.
Can I make this dairy-free?
You can try using coconut cream for whipping and a dairy-free sweetened condensed milk alternative. Note that the flavor and texture will be different, but still delicious.
Is this safe for kids?
Yes! The alcohol in vanilla extract is minimal and cooked off in the reduction if you’re using it there. Dr Pepper does contain some caffeine, but the amount per serving is very low once it’s been reduced and divided across the batch.
Can I double the recipe?
Absolutely. Just make sure to use a larger container or divide it into two loaf pans for freezing.
How long does it last in the freezer?
About 2 weeks. After that, the texture can start to change and ice crystals may form, but it’ll still be safe to eat.
Final Thoughts
Dr Pepper Ice Cream (No-Churn Swirl) is a fun, flavorful way to explore the magic of soda in dessert form. Whether you’re reminiscing about soda fountains and root beer floats or just looking for a new no-churn ice cream to fall in love with, this recipe is for you. It’s simple to make, easy to customize, and an absolute conversation starter at any gathering.
If you give this recipe a try, I’d love to hear what you think. Leave a review, or share a photo and tag me on Pinterest. Your swirls might just inspire someone else to take the frozen plunge!
Nutritional Information (Per ½ Cup Serving, Approximate)
- Calories: 285
- Total Fat: 18g
- Saturated Fat: 11g
- Carbohydrates: 29g
- Sugars: 25g
- Protein: 3g
- Sodium: 60mg
Dr Pepper Ice Cream (No-Churn Swirl)
Description
Dr Pepper Ice Cream (No-Churn Swirl) is a creamy vanilla frozen treat with bold ribbons of real Dr Pepper reduction swirled throughout. It’s everything you love about soda-shop nostalgia, reimagined into a fun, fuss-free no-churn dessert. Perfect for summer nights, movie parties, or whenever you’re craving something unique and cool.
Ingredients
For the Dr Pepper Reduction:
2 cups Dr Pepper
2 tablespoons brown sugar
Optional: 1 teaspoon vanilla extract or a pinch of cinnamon
For the No-Churn Ice Cream Base:
2 cups cold heavy whipping cream
1 (14-ounce) can sweetened condensed milk
1 teaspoon vanilla extract
Instructions
Make the Dr Pepper Reduction:
In a medium saucepan, combine Dr Pepper and brown sugar. Simmer over medium heat for 20–25 minutes, stirring occasionally, until it reduces to about ½ cup and becomes syrupy. Remove from heat. Stir in vanilla or cinnamon if using, and allow to cool completely.Whip the Cream:
In a chilled mixing bowl, whip the cold heavy cream with a hand mixer until stiff peaks form—about 3 to 4 minutes.Combine the Base:
In a separate bowl, mix sweetened condensed milk and vanilla extract. Gently fold in the whipped cream in batches, using a spatula, until fully incorporated.Layer and Swirl:
Pour half the ice cream base into a loaf pan or freezer-safe container. Drizzle some of the cooled Dr Pepper syrup over it. Repeat with remaining base and syrup. Use a knife or skewer to gently swirl the syrup through the mixture.
Freeze:
Cover the pan tightly and freeze for at least 6 hours or overnight, until the ice cream is firm and scoopable.
Notes
Use regular Dr Pepper—not diet—for a proper syrupy reduction.
Let the reduction cool completely before swirling to prevent melting the base.
For extra soda-shop flair, stir in chopped maraschino cherries or mini chocolate chips.
This ice cream keeps well for up to 2 weeks in the freezer. Press a piece of wax paper or plastic wrap onto the surface before sealing to prevent ice crystals.
Want to change it up? Try swapping Dr Pepper with cherry soda or root beer for a new twist!