

Thank you so much for being here. Whether you’re reminiscing about your Saturday morning cartoons or looking for an unforgettable dessert that’ll bring smiles to kids and adults alike, this one’s for you. Today, I’m excited to share a recipe that’s equal parts whimsical and indulgent: Fruity Pebbles Cheesecake. This no-bake dessert blends sweet nostalgia with creamy sophistication. Picture marshmallow Fruity Pebbles bars layered with velvety cheesecake filling. It’s vibrant, celebratory, and incredibly simple to make.
What is Fruity Pebbles Cheesecake?
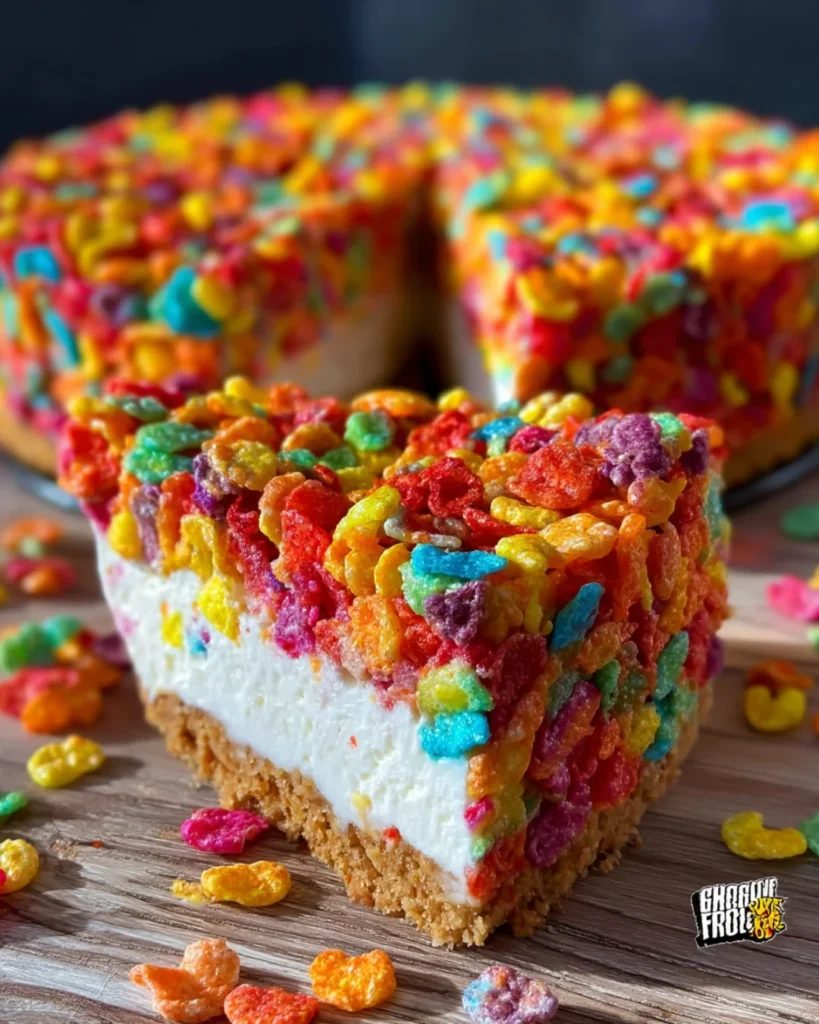
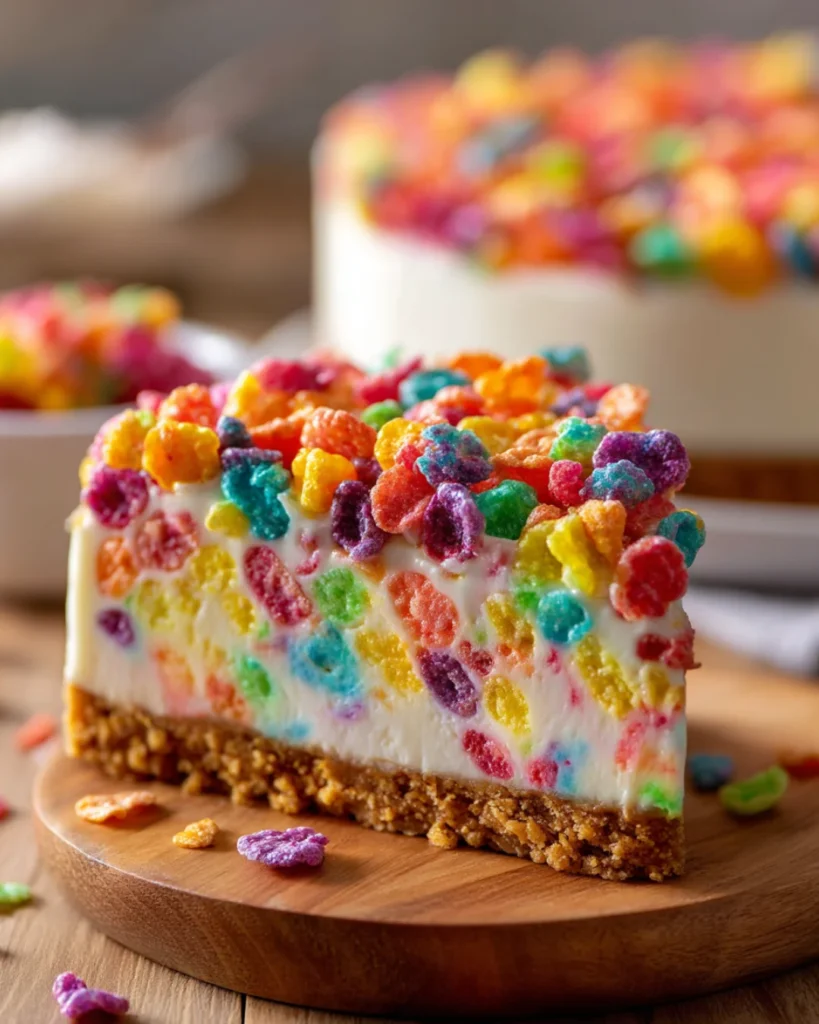
Fruity Pebbles Cheesecake is a no-bake layered dessert featuring two main components: a chewy, marshmallow-based crust made from Fruity Pebbles cereal, and a fluffy, lightly sweetened cream cheese filling. The top is finished off with more Fruity Pebbles mixture, giving the whole dessert a pop of texture and a rainbow-bright finish.
It’s basically like combining two iconic treats into one: the sticky-sweet joy of Fruity Pebbles marshmallow bars and the luxurious smoothness of a no-bake cheesecake. The result is a dessert that’s as fun to look at as it is to eat.
Why You’ll Love This Recipe
There are so many reasons this dessert deserves a spot on your table.
No baking required. Seriously. You won’t need to turn on your oven at all, which makes this recipe perfect for warm weather or busy holiday prep.
Kid-friendly and adult-approved. Fruity Pebbles bring the nostalgia and color, while the cheesecake filling offers a rich, tangy contrast that makes it irresistible to all ages.
Show-stopping presentation. The rainbow cereal topping makes this dessert as photogenic as it is flavorful.
Quick and easy. With minimal ingredients and simple steps, this is a go-to recipe when you want maximum impact with minimum fuss.
Make-ahead magic. You can (and should) make it the day before to let it chill and set properly. It’s an entertainer’s dream.
The Taste
Let’s talk flavor. The base layer is chewy, buttery, and marshmallow-sweet, with those crisp little Fruity Pebbles adding a bright pop of fruit flavor. The filling is creamy, smooth, and lightly tangy, thanks to a mix of cream cheese, sugar, and vanilla. Topped off with more of that colorful cereal bar mixture, you get a fantastic contrast between soft, airy filling and crunchy, chewy topping.
Each bite is a dreamy blend of textures — the kind that makes you go back for seconds (and thirds). It’s sweet, yes, but it’s balanced with the tanginess of the cheesecake and the crunch of the cereal, making it feel indulgent but not overwhelming.
Benefits of Making Fruity Pebbles Cheesecake
- Versatility. This dessert is perfect for birthdays, holidays, summer BBQs, or just a weekend treat.
- Crowd-pleaser. Everyone, from toddlers to grandparents, will find something to love here.
- Easy to adapt. You can swap out cereals, add flavorings to the cheesecake, or customize the presentation.
- Great for make-ahead. Make it the day before your event, and you’re already one step ahead.
- Fun to make with kids. The cereal layer is like edible confetti, and little hands will love helping with assembly.
Ingredients (Serves 9–12)
For the Crust and Topping
- 6 cups Fruity Pebbles cereal
- 1 (10 oz) bag mini marshmallows
- 4 tablespoons unsalted butter
- Pinch of salt
For the Cheesecake Filling
- 16 oz (two blocks) cream cheese, softened
- ½ cup granulated sugar
- 1½ teaspoons vanilla extract
- 1 cup cold heavy cream
Tools You’ll Need
- 8×8-inch square baking dish
- Large saucepan
- Electric mixer or stand mixer
- Mixing bowls
- Spatula
- Measuring cups and spoons
- Parchment paper (optional, for easy lifting)
Ingredient Substitutions and Additions
Cereal swaps. You can easily use Cocoa Pebbles, Rice Krispies, or even Cap’n Crunch if you want to play with flavor and texture.
Sugar substitutes. Want to cut down the sugar? Use a sugar substitute like erythritol or monk fruit sweetener in the cheesecake filling.
Flavor variations. Add lemon zest or a few tablespoons of fruit purée to the cheesecake filling to give it a tangy twist.
Extra toppings. Drizzle with white chocolate, add whipped cream, or sprinkle crushed freeze-dried strawberries on top for extra flair.
Make it nutty. Stir in crushed pistachios or almonds for added crunch.
Step-by-Step Instructions
Step 1: Prepare the Fruity Pebbles “Crust”
In a large saucepan over low heat, melt the butter. Once fully melted, add the marshmallows and stir until they melt into a smooth, glossy mixture.
Remove from heat and stir in the Fruity Pebbles cereal and a pinch of salt. Work quickly — the mixture will begin to stiffen as it cools.
Press half of the cereal mixture into the bottom of a greased or parchment-lined 8×8-inch square baking dish. Press firmly to form an even crust. Set aside the other half for the topping.
Step 2: Make the Cheesecake Filling
In a large bowl, beat the softened cream cheese, sugar, and vanilla extract until light and creamy. This step is important — take your time to ensure no lumps remain.
In a separate bowl, whip the cold heavy cream until stiff peaks form. This can take 2–4 minutes with an electric mixer.
Gently fold the whipped cream into the cream cheese mixture. Use a spatula and a gentle hand to keep the mixture fluffy and airy.
Step 3: Assemble the Cheesecake
Spoon the cheesecake filling over the prepared cereal crust. Spread it into an even layer using a spatula or the back of a spoon.
Crumble the remaining Fruity Pebbles mixture on top and press it gently into the filling to form the topping. You don’t want to crush the filling — just anchor the cereal mix in place.
Step 4: Chill to Set
Cover the dish and refrigerate for at least 4 hours, preferably overnight. The longer it chills, the easier it will be to slice.
When ready to serve, remove from the fridge, slice into squares, and enjoy chilled.
What to Serve with Fruity Pebbles Cheesecake
This cheesecake is delightful on its own, but it pairs beautifully with:
- Fresh strawberries or blueberries for a fruity contrast
- A dollop of whipped cream or a swirl of vanilla bean yogurt
- A glass of cold milk or creamy iced coffee
- Fun drinks like root beer floats or strawberry milk
If you’re building a dessert spread, you’ll love adding complementary no-bake treats like this Chocolate Eclair Cake or these playful Root Beer Cupcakes. They keep the fun, retro vibes going while offering different textures and flavors.
Tips for Success
- Work quickly with the marshmallow mixture. It sets fast, so be ready to press it into your pan as soon as it’s mixed.
- Use softened cream cheese. This ensures a smooth, lump-free filling.
- Chill overnight for best results. The cheesecake sets up firmer and slices more cleanly.
- Grease your hands. When pressing the cereal mixture, a bit of butter or oil on your hands keeps it from sticking.
- Line your pan with parchment. It makes lifting and cutting a breeze — plus cleanup is easier.
Storage Instructions
Refrigerator: Store covered in the fridge for up to 5 days. The cereal layer will soften over time, but the flavor remains delicious.
Freezer: You can freeze individual slices. Wrap each square in plastic wrap and store in a freezer-safe container for up to one month. Thaw in the fridge before serving.
Make-ahead tip: You can prepare this dessert a full day ahead. In fact, it’s better that way — the extra chill time makes for a perfectly set cheesecake.
Frequently Asked Questions
Can I use a different cereal?
Absolutely. Cocoa Pebbles, Rice Krispies, or even Cornflakes can work. Each will bring a different texture and flavor.
Is it gluten-free?
Fruity Pebbles are gluten-free, but always double-check the brand to ensure no cross-contamination or added gluten in marshmallows.
Can I double the recipe?
Yes, just use a 9×13-inch pan and double all ingredients. It’s perfect for parties or potlucks.
Is it okay to leave it at room temperature?
It can be left out for up to 2 hours, but after that, it should go back into the fridge to maintain texture and freshness.
Can I flavor the filling differently?
Definitely! Add lemon zest, almond extract, or even a swirl of berry puree to switch things up.
How can I make this dairy-free?
Use vegan cream cheese and substitute the heavy cream with coconut cream. The texture may be slightly different, but still delicious.
Conclusion
This Fruity Pebbles Cheesecake is a party in every bite. It’s bright, fun, rich, and surprisingly simple to make. Whether you’re whipping it up for a birthday bash, a casual get-together, or just to relive your Saturday morning cartoon dreams, this recipe delivers in both flavor and visual appeal.
Looking for more no-bake dessert magic? You’ll love exploring the creamy decadence of this Chocolate Eclair Cake or diving into breakfast-for-dessert fun with Tiramisu Pancakes. Each of these recipes brings something unique to the table, and they all pair beautifully in a fun, nostalgic dessert spread.
Share Your Creation
If you try this Fruity Pebbles Cheesecake, I’d love to see it! Share your photos, leave a review, and pin it to your favorite dessert board. Seeing your kitchen wins brings me so much joy — and I’m always inspired by your creative spins on these recipes. Let’s keep the sweet inspiration going.
Nutritional Information (per serving, based on 12 servings)
- Calories: 320
- Fat: 20g
- Saturated Fat: 12g
- Carbohydrates: 32g
- Sugar: 25g
- Protein: 3g
Fruity Pebbles Cheesecake – Colorful Crunch Meets Creamy Cheesecake
Description
This no-bake Fruity Pebbles Cheesecake is a colorful twist on classic cheesecake, layered with marshmallow Fruity Pebbles bars and a creamy vanilla filling. Fun, nostalgic, and totally kid-approved, it’s the perfect party dessert — vibrant, sweet, and anything but boring! Make it ahead for easy serving and guaranteed smiles.
Ingredients
For the Crust & Topping:
-
6 cups Fruity Pebbles cereal
-
1 (10 oz) bag mini marshmallows
-
4 tablespoons unsalted butter
-
Pinch of salt
For the Cheesecake Filling:
-
16 oz (2 blocks) cream cheese, softened
-
½ cup granulated sugar
-
1½ teaspoons vanilla extract
-
1 cup cold heavy cream
Instructions
-
Make the Fruity Pebbles Crust:
In a large saucepan over low heat, melt the butter. Add marshmallows and stir until completely melted and smooth. Remove from heat and quickly stir in Fruity Pebbles cereal and a pinch of salt until evenly coated. Press half of the mixture firmly into a greased or parchment-lined 8×8-inch pan to form the crust. Set the other half aside for topping. -
Prepare the Cheesecake Filling:
In a large mixing bowl, beat the softened cream cheese, sugar, and vanilla extract until smooth and creamy. In a separate bowl, whip the cold heavy cream until stiff peaks form. Gently fold the whipped cream into the cream cheese mixture until fully combined and fluffy. -
Assemble the Cheesecake:
Spread the cheesecake filling evenly over the Fruity Pebbles crust. Top with the remaining cereal-marshmallow mixture by gently pressing it on top.
-
Chill to Set:
Refrigerate the cheesecake for at least 4 hours, or overnight, until fully set. Slice into squares and serve chilled for the best texture.
Notes
-
Line your pan with parchment for easy removal and clean slices.
-
Grease your hands lightly when pressing the cereal mixture — it’s sticky!
-
Make it your own: swap Fruity Pebbles for Cocoa Pebbles, or add a swirl of strawberry jam to the filling.
-
This cheesecake keeps well in the fridge for up to 5 days and can be frozen in individual slices for up to 1 month.
-
Want extra flair? Add whipped cream, a white chocolate drizzle, or fresh fruit on top before serving.