
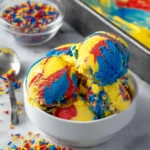
Thank you so much for being here. Truly, it means the world to me that you’re joining me in the kitchen for something as joyful as this Homemade Superman Ice Cream. This isn’t just any ice cream—it’s a no-churn, full-of-whimsy, spoonful-of-nostalgia kind of dessert that brings out the kid in all of us. I’m talking vibrant red, yellow, and blue swirls in a creamy, dreamy base, ready to steal the show at your next party—or just brighten up your Tuesday night.
I first made this on a whim, hoping to recreate a childhood favorite that I used to get at our local ice cream shop every summer. What I ended up with was a no-churn recipe that’s not only easier than expected, but also endlessly fun to customize. Whether you stick to the classic vanilla base or jazz it up with fruity flavors, the result is magical in every sense.
What Is Superman Ice Cream?
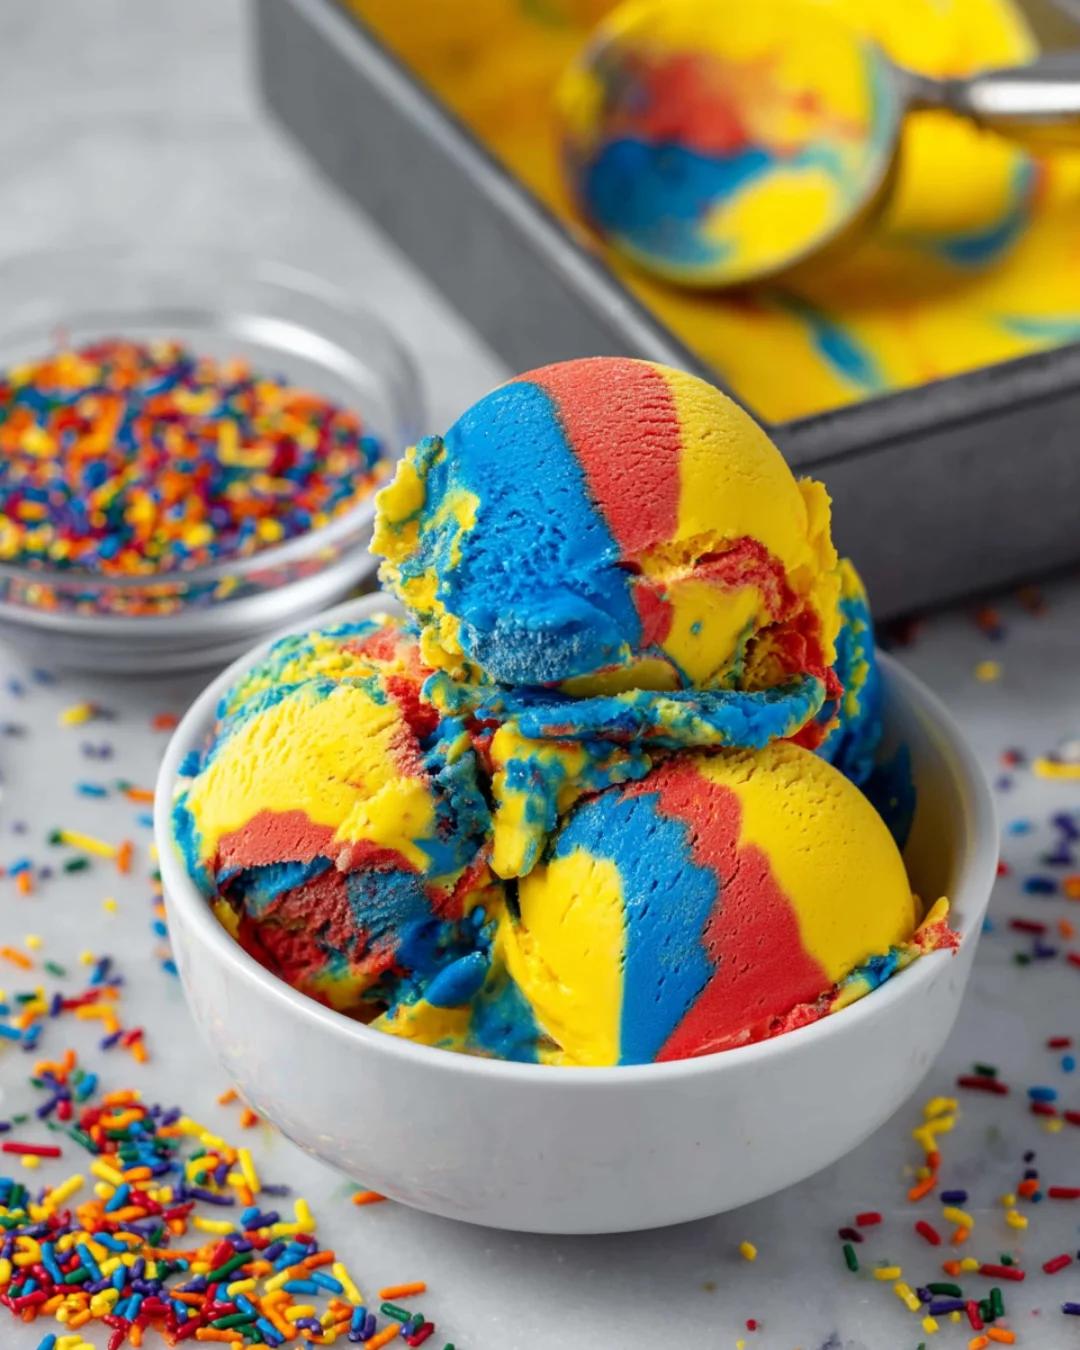
Superman Ice Cream is a Midwestern staple that’s especially iconic in Michigan. Its signature? Bold stripes of red, yellow, and blue that usually come with playful fruit flavors like cherry, lemon, and blue raspberry. It’s one of those regional treats that sparks fierce loyalty and wide-eyed delight from those who grew up with it. Think of it as rainbow sherbet’s richer, creamier cousin.
Traditionally, it’s made with a churned ice cream base, but this no-churn version lets anyone make it—no special machines required. The base comes together with just whipped cream and sweetened condensed milk, and it freezes beautifully in a loaf pan. The real fun, of course, is in swirling the colors and watching it transform into a rainbow you can eat.
Why You’ll Love This Homemade Superman Ice Cream
This recipe checks every box. It’s easy, colorful, and a total crowd-pleaser. Here are just a few reasons to fall head over heels:
No-Churn Simplicity
You don’t need an ice cream maker—just a hand mixer and a bit of patience while it chills. If you’ve ever been intimidated by making ice cream at home, this is your moment.
Perfect for Kids and Parties
What’s more fun than rainbow ice cream? Seriously. Whether you’re hosting a birthday bash or looking for an activity to keep little hands busy, this is a guaranteed hit.
Customizable Flavors
You can stick to classic vanilla, or add flavor extracts to each color for something extra-special. Cherry, lemon, and blue raspberry are traditional, but don’t be afraid to play.
Visually Stunning
Those bold primary colors swirl into something spectacular. It’s not just tasty—it’s Insta-worthy.
What Does It Taste Like?
The flavor of Superman Ice Cream depends a bit on how you customize it. The base version here is vanilla-forward, so you’ll get rich, creamy sweetness in every bite—think sweet cream meets soft serve. Add the optional extracts, and each color delivers its own pop of fruity flavor: cherry red, zesty lemon yellow, and candy-sweet blue raspberry. Together, they make each spoonful a new surprise.
Benefits of No-Churn Ice Cream
This recipe is more than just pretty. Here’s why no-churn ice cream is one of my favorite kitchen hacks:
It’s beginner-friendly. You don’t need any fancy equipment, just a mixer and a loaf pan.
It’s fast to make (with a little patience for freezing).
The texture is incredibly smooth and creamy—just like churned ice cream.
You can easily scale it, double it, or tweak the flavors to match your mood or your menu.
It’s a fantastic base for add-ins, toppings, and mix-ins—sprinkles, chocolate chips, candy bits—you name it.
Ingredients for No-Churn Superman Ice Cream
Here’s everything you’ll need to whip up this magical dessert:
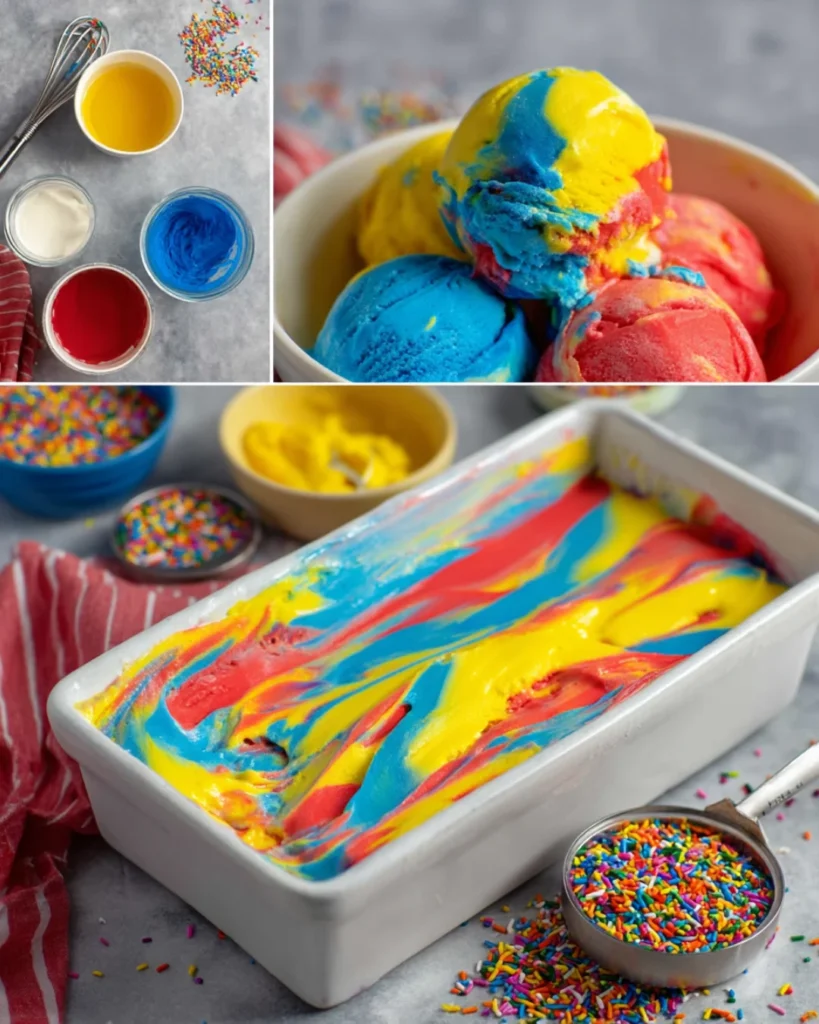
2 cups cold heavy whipping cream
1 (14-ounce) can of sweetened condensed milk
1 teaspoon vanilla extract
Red, yellow, and blue gel food coloring (use gel instead of liquid for the boldest hues)
Optional: ¼ teaspoon of flavor extract for each color—cherry for red, lemon for yellow, blue raspberry for blue
Tools You’ll Need
Stand mixer or hand mixer
Three medium bowls for separating and coloring the base
One large mixing bowl
Spatula
Loaf pan or freezer-safe container
Butter knife or skewer for swirling
Plastic wrap or a lid to cover while freezing
Ingredient Substitutions and Additions
Not a fan of food coloring? You can substitute with natural dyes like beet juice, turmeric, and butterfly pea powder, though the shades will be more subtle.
Want to make it dairy-free? Use full-fat coconut cream in place of heavy cream, and swap in sweetened condensed coconut milk. It will taste a little different but still delicious.
For extra fun, add sprinkles or edible glitter into each color batch before freezing.
Want different flavors? Swap the cherry, lemon, and blue raspberry extracts for cotton candy, orange, bubblegum, or marshmallow extracts to suit your taste.
Step-by-Step Instructions
Whip the Cream
In a mixing bowl, whip the cold heavy cream using a stand mixer or hand mixer on high speed until stiff peaks form. This usually takes about 3 to 4 minutes. The cream should be thick and hold its shape when you lift the beater.
Make the Base
In a separate large bowl, stir the vanilla extract into the sweetened condensed milk. Mix until completely smooth and uniform.
Fold It Together
Gently fold the whipped cream into the condensed milk mixture using a spatula. Be gentle—you want to maintain the airiness of the whipped cream, which gives your ice cream its luscious texture.
Divide and Color
Split the mixture evenly into three separate bowls. Add a few drops of gel food coloring to each—red in one bowl, yellow in another, and blue in the third. Stir gently until the color is fully incorporated.
Flavor It (Optional)
This is your moment to customize. Add ¼ teaspoon of cherry extract to the red batch, lemon to the yellow, and blue raspberry to the blue. Stir gently to mix without deflating the mixture.
Assemble the Swirls
Spoon dollops of each colored mixture randomly into a loaf pan. Don’t layer them too neatly—you want a fun, organic swirl. Once all the batter is in the pan, use a butter knife or skewer to make one or two figure-eight swirls through the mixture. Be careful not to overmix, or you’ll muddy the colors.
Freeze
Cover the pan tightly with plastic wrap or a lid. Place in the freezer and chill for at least 4 to 6 hours, or overnight for best results.
What to Serve with Superman Ice Cream
A bowl or sugar cone is always a classic, but don’t stop there. Here are some extra-fun ways to serve it:
Top with rainbow sprinkles, crushed cookies, or mini marshmallows for a party-ready presentation.
Scoop it into waffle cones that have been dipped in white chocolate and rolled in colored sugar.
Layer it with whipped cream and fruit in a trifle bowl for a colorful parfait.
Use it as the base of an epic superhero sundae with fudge sauce, candy pieces, and whipped cream.
Tips for the Creamiest, Dreamiest Results
Use cold cream straight from the fridge. Cold cream whips better and faster.
Avoid overmixing during folding—keep things light and fluffy.
Use a metal or glass loaf pan for even freezing. Plastic containers may slow down the process.
Let the ice cream sit at room temperature for 5 minutes before scooping for the perfect texture.
Use a hot scoop—run it under hot water and shake off excess moisture to glide through the ice cream easily.

How to Store Homemade Ice Cream
Store your Superman Ice Cream in the back of the freezer where it’s coldest and most stable. Keep it covered tightly with a lid or plastic wrap. It’s best enjoyed within two weeks for peak texture and flavor. After that, it may begin to develop ice crystals, especially if it’s been opened and closed often.
Frequently Asked Questions
Can I make this without food coloring?
Yes! You can make a delicious vanilla ice cream base without the colors. You’ll lose the signature “Superman” effect, but the flavor will still shine.
How long does this ice cream last?
Homemade no-churn ice cream is best enjoyed within 1 to 2 weeks. Keep it tightly sealed and avoid frequent thawing and refreezing.
Is this recipe safe for kids?
Absolutely! If you’re concerned about food dye sensitivities, look for natural or plant-based food colorings, or leave out the coloring entirely.
Can I make this in advance?
Definitely. In fact, I recommend freezing it overnight to give it time to firm up fully. Make it the night before a party and scoop it fresh the next day.
How can I make this more nutritious?
While ice cream is a treat, you can make small swaps like using organic ingredients or coconut milk instead of dairy. You can also reduce the sweetness slightly by using unsweetened condensed milk if you can find it.
Conclusion
Homemade Superman Ice Cream is more than just a dessert—it’s a celebration in a pan. It’s the kind of recipe that invites creativity, brings families together, and makes everyone feel a little more like a superhero. Whether you’re swirling it into cones at a birthday party or sneaking a spoonful straight from the freezer (guilty), it’s the kind of joyful indulgence that’s worth every step.
So go on, make a batch this weekend. Let the colors swirl, the flavors sing, and the smiles unfold. And when you do, I’d love to see it. Share your creation with me and let the world see your homemade superpowers.
More Recipes You’ll Love
If you loved the creamy delight of this Superman Ice Cream, you’re going to swoon over these colorful and crowd-pleasing desserts too:
Easy White Chocolate Brownie Pizza – A vibrant, gooey dessert pizza topped with sweet white chocolate and sprinkles.
Cheesecake Egg Rolls with Caramel Sauce – Crispy, golden egg rolls stuffed with rich cheesecake filling and drizzled with warm caramel.
No-Bake Brownie Batter Cheesecake – Dreamy, decadent, and easy to whip up without turning on the oven.
Leave a Review and Share Your Swirls
Tried this recipe? I’d love to hear what you think. Drop a comment below with your thoughts or any creative twists you tried. Better yet, share a photo on Pinterest or tag me online so I can see your superhero-worthy scoops. Your feedback not only makes my day—it helps others find their new favorite recipe too.
Nutritional Information (Per 1/2 Cup Serving)
Calories: 220
Total Fat: 14g
Saturated Fat: 9g
Carbohydrates: 22g
Sugars: 20g
Protein: 3g
Homemade Superman Ice Cream (No-Churn, Full of Color and Fun)
Description
Homemade Superman Ice Cream is a no-churn, creamy treat full of bold red, yellow, and blue swirls. It’s fun, colorful, and super easy to make—no ice cream machine needed! Perfect for birthdays, summer parties, or a nostalgic dessert night with the family. Customize with fruity flavors or keep it classic vanilla. It’s a guaranteed crowd-pleaser and a joy to scoop.
Ingredients
2 cups cold heavy whipping cream
1 (14-ounce) can sweetened condensed milk
1 teaspoon vanilla extract
Red gel food coloring
Yellow gel food coloring
Blue gel food coloring
Optional: ¼ teaspoon cherry extract (for red)
Optional: ¼ teaspoon lemon extract (for yellow)
Optional: ¼ teaspoon blue raspberry extract (for blue)
Instructions
In a large bowl, beat the cold heavy cream with a hand mixer or stand mixer on high speed until stiff peaks form (about 3–4 minutes).
In a separate bowl, stir together the sweetened condensed milk and vanilla extract until fully combined.
Gently fold the whipped cream into the condensed milk mixture with a spatula. Mix until smooth and airy—don’t overmix!
Divide the mixture evenly into three bowls. Add red food coloring to one, yellow to the second, and blue to the third. Stir each just until the color is fully blended.
Optional: Add a few drops of cherry, lemon, and blue raspberry extract to their corresponding colors and mix gently.
Spoon dollops of each color randomly into a loaf pan. Use a butter knife to gently swirl once or twice—avoid over-swirling to keep the colors distinct.
Cover the pan tightly with plastic wrap or a lid and freeze for at least 4–6 hours, or until solid.
Let sit for 5 minutes before scooping, then serve in bowls or cones and enjoy the colorful magic!
Notes
For best results, use gel food coloring—not liquid—to get those bold, vibrant hues.
Want natural coloring? Try beet powder (red), turmeric (yellow), and butterfly pea powder (blue)—the colors will be more subtle.
Store tightly covered in the freezer for up to 2 weeks.
A warm ice cream scoop (dipped in hot water) makes scooping even easier!
This recipe is naturally egg-free and easy to make dairy-free with coconut cream and sweetened condensed coconut milk.