

Thank you for being here. I don’t take it lightly that you’re looking for meaningful ways to connect with your child, soothe their senses, and create hands-on learning experiences that spark joy. That’s why I’m so excited to share this Sea in a Bottle Sensory Craft with you. It’s one of those simple, beautiful projects that packs a surprising punch—calming, easy to make, and full of creative potential.
Right after I made the first one, I knew I had to pass it along. Watching the tiny seashells tumble through waves of blue water, the soft clinking of pebbles echoing in the bottle, and the way my child’s eyes widened in delight—it was magic. It’s moments like those that remind me why we do these crafts in the first place.
If you’re not already on the list, I invite you to subscribe to receive creative crafts, calming play ideas, and easy homemade activities straight to your inbox. You’ll never run out of inspiration again.
What is a Sea in a Bottle Sensory Craft?
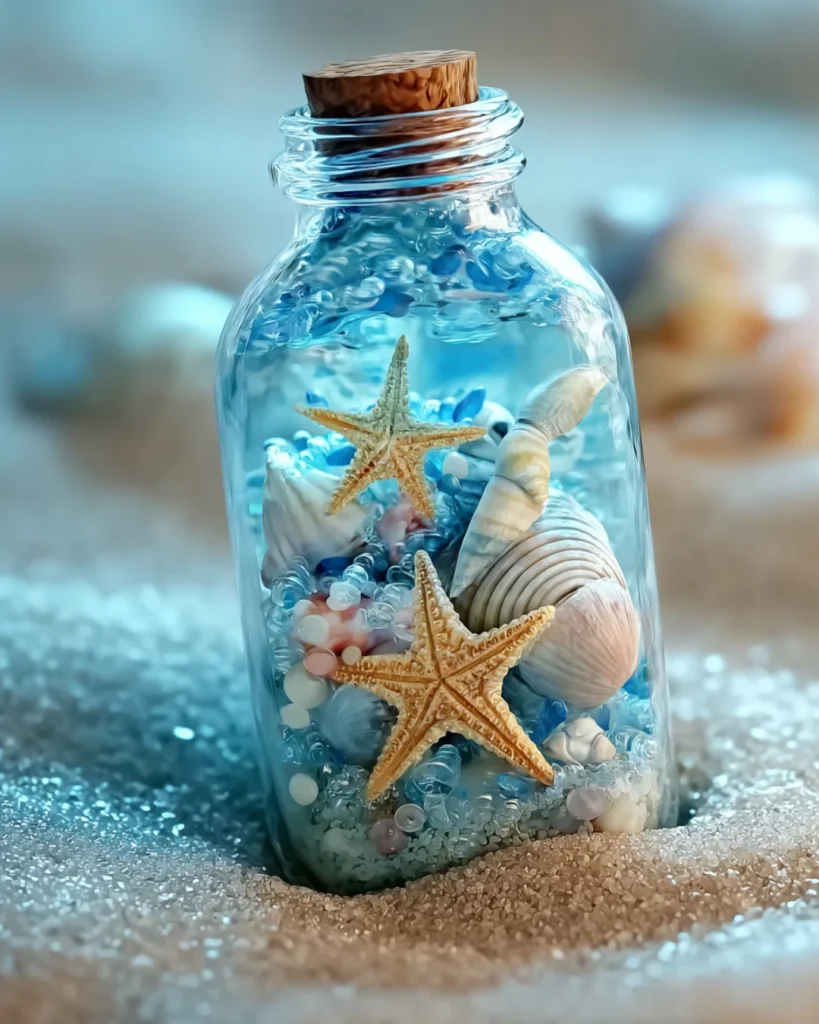
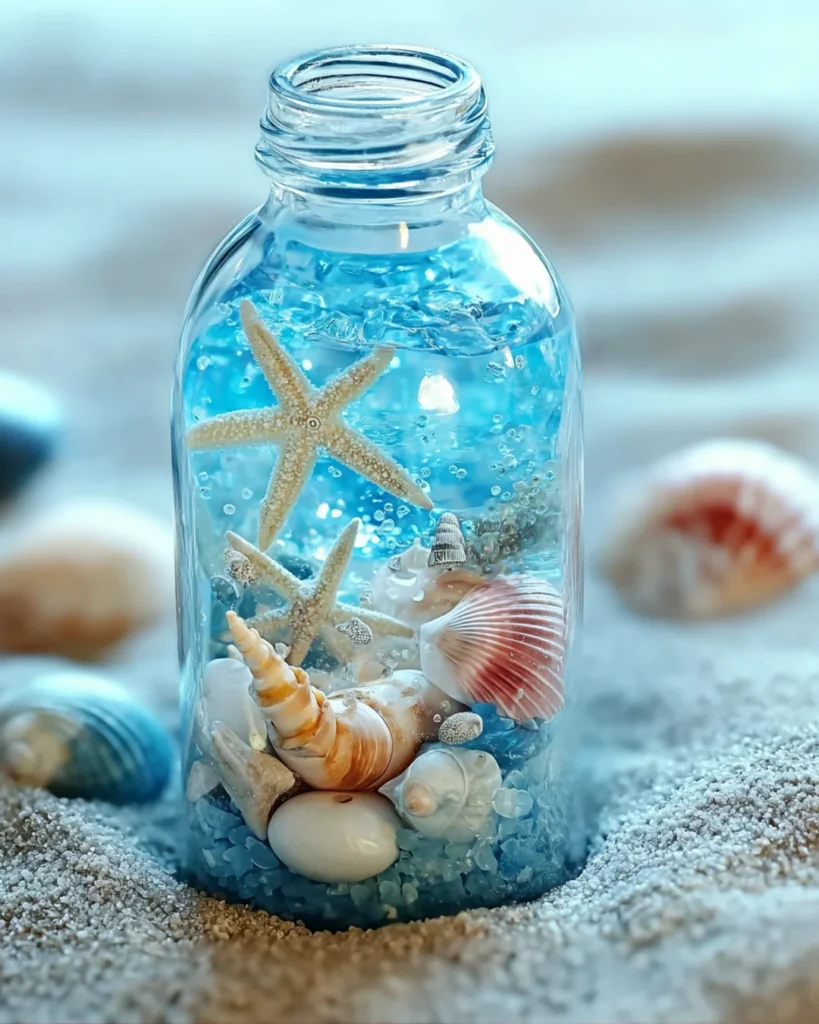
At its heart, the Sea in a Bottle is a DIY sensory bottle designed to replicate the calming, visual beauty of ocean waves. It combines the natural appeal of beach treasures—like shells and sand—with movement, color, and gentle sound. With every shake, children get to watch a miniature underwater world come to life.
Sensory bottles are often used in early childhood development settings, occupational therapy, or simply for fun, because they support a variety of learning and emotional benefits. They’re particularly effective in calming overstimulation or aiding transitions between activities.
Why You’ll Love This Sensory Craft
This activity is more than just fun. It serves a deeper purpose, offering your child a form of self-regulation and creative exploration. Here’s why it deserves a spot in your craft rotation.
- It’s simple to create and requires only a few materials, many of which you might already have at home.
- The bottle provides a visual anchor for children who need help calming their thoughts or emotions.
- It’s completely customizable. You can make it whimsical, natural, sparkly, or even thematic—like a pirate treasure hunt or an underwater mermaid kingdom.
- It travels well. This is one of my favorite parts. Toss it into a bag before a long car ride or bring it along to appointments. It’s quiet, self-contained, and endlessly interesting.
- Best of all, it opens the door for imaginative storytelling. Suddenly, that tiny shell isn’t just a shell—it’s part of a sunken ship waiting to be discovered.
What It Feels and Sounds Like
Imagine holding the sea in your hands. When you shake the bottle, tiny waves form and swirl, carrying along sparkling bits of sand, smooth stones, and miniature ocean treasures. The soft rattle of pebbles or glass beads is soothing—not jarring—and the movement is mesmerizing. Children naturally fall into a rhythm as they rotate the bottle back and forth, watching each item rise and sink like sea creatures in a current. It’s a calming sensory experience for the eyes, ears, and even emotions.
Benefits of Sensory Bottles for Children
These types of sensory tools offer real benefits for children of all ages and needs.
- They promote focus by offering a quiet, engaging visual task.
- They help children practice mindfulness and body regulation.
- They can act as a “calm-down” tool during meltdowns or high-energy moments.
- They offer tactile and visual sensory input without any mess.
- They support cognitive development by introducing science concepts like density, buoyancy, and cause-and-effect.
They’re not just beautiful—they’re backed by developmental science.
Ingredients and Materials You’ll Need
You don’t need anything fancy to make a sensory bottle. In fact, you can easily adapt this based on what you have on hand. Here’s the basic list:
- One lightweight, clear plastic bottle (preferably with a secure, screw-on lid)
- Water
- Blue food coloring (only one drop is needed to tint the water)
- Seashells (collected from a beach trip or craft store)
- Small starfish or plastic marine animals
- Glass beads, marbles, or aquarium gravel
- Fine sand (optional for beach effect)
- Glitter (optional for sparkle)
- Hot glue gun or strong waterproof tape for sealing the lid
Tools You’ll Need for Assembly
- A small funnel (useful for sand, gravel, or glitter)
- Stir stick or spoon (to mix color or move items)
- Scissors (if modifying bottle size or trimming tape)
- Paper towels (for cleanup during assembly)
Ingredient Additions and Substitutions
Don’t have seashells or sand? No problem. Here are some creative alternatives:
- Use colored buttons, clear marbles, or sea-themed beads.
- Instead of sand, add a pinch of salt or crushed oats for texture.
- No aquarium gravel? Try small pebbles from the garden, washed and dried.
- For a fantasy-themed version, use tiny mermaids, pirates, or treasure chest charms.
- Add essential oils to the cap area (not inside the water) to enhance calming properties through scent.
These changes don’t just make the bottle unique—they also turn it into a teaching opportunity. Let your child help pick the theme or gather materials from a nature walk.
Step-by-Step Instructions for Making a Sea in a Bottle
- Fill your bottle about three-quarters full with clean water. This allows enough space for movement and avoids spills when adding items.
- Add one drop of blue food coloring to tint the water. Stir with a spoon or stir stick. For a lighter ocean look, go easy on the color—it’s surprisingly potent.
- Use a funnel to add sand, if using, followed by your seashells, beads, and other chosen items. Drop them in one at a time so they don’t jam at the neck of the bottle.
- Test the motion. If the water moves too slowly or quickly, adjust the content. You can even add a bit of baby oil to slow the motion and create a more wave-like effect.
- Once satisfied, seal the bottle. Apply hot glue around the rim of the bottle’s opening before twisting the cap on securely. You can also wrap waterproof tape around the neck and lid for extra security.
- Gently shake and observe. Watch how each object interacts with the water and how long it takes to settle.
What to Serve or Pair With This Activity
If you’re planning a sensory-themed morning or rainy-day lineup, here are some great pairings:
- Read a story like “A House for Hermit Crab” or “Mister Seahorse” by Eric Carle
- Enjoy ocean-themed snacks like fish crackers, blue gelatin cups, or fruit arranged in wave patterns
- Create a matching craft such as ocean-themed playdough or salt-dough seashell prints
- Play instrumental beach sounds or underwater music to enhance the experience
- Add a yoga or meditation segment with deep breathing while watching the bottle
Tips for a Successful Sensory Bottle
- Use a plastic bottle that’s lightweight and safe for children. Avoid glass for safety reasons.
- Leave some air in the bottle. This allows movement and prevents overfilling.
- Add only a small drop of food coloring at first. You can always add more.
- Test the seal after glueing. Shake the bottle and tilt it in all directions to ensure no leaks.
- If your child is young, always supervise and inspect the bottle before use.
How to Store and Maintain Your Sensory Bottle
- Store upright when not in use to prevent potential leaking.
- Avoid exposure to direct sunlight for extended periods, which can fade colors and damage plastic.
- If the bottle becomes cloudy over time, open and replace the water, then reseal.
- Wipe clean with a soft cloth or baby wipe as needed.
With proper care, your bottle can last for months or even a full year before needing a refresh.
Frequently Asked Questions
Can I use oil instead of water?
Yes, you can use baby oil or mineral oil to slow the movement inside the bottle. This creates a more flowing, wave-like visual. Note that oil is heavier and requires secure sealing.
Is this activity suitable for toddlers?
Yes, with supervision. Make sure the bottle is tightly sealed and inspect it regularly for signs of wear. Use larger, child-safe objects inside to prevent choking hazards if the bottle is ever compromised.
How long does a sensory bottle last?
With good sealing and proper care, your sensory bottle can last for several months. You may eventually need to replace the water if it becomes cloudy or if mold develops from organic materials like sand.
Can I use dish soap or glycerin?
Yes. A few drops of dish soap or a splash of glycerin can help thicken the water and slow movement, adding to the calming effect. Just be careful not to add too much, or the contents may bubble.
Can I theme the bottle?
Absolutely. You can create bottles for all kinds of learning topics—space, the rainforest, colors, emotions, or even holidays. For this ocean-themed version, feel free to add items that relate to your child’s favorite sea creature or beach memory.
Conclusion
I hope this Sea in a Bottle Sensory Craft becomes one of those go-to activities in your home—the kind that lives on a shelf nearby, ready to offer calm in a storm, focus in a flurry, or just a little bit of joy in the day.
It’s beautiful in its simplicity. It teaches, calms, and delights all at once. Whether your child is swirling glittery waves before bedtime, exploring textures during playtime, or just watching the sea tumble through their bottle on a quiet afternoon, this craft delivers moments that matter.
Let your creativity flow, just like the waves inside your bottle. Make it personal. Make it peaceful. Most importantly, make it together.
Other Calming Ocean-Themed Crafts to Try
- Ocean Sensory Bin with Blue Rice and Shells
- Mermaid Tail Slime with Sparkling Beads
- Under-the-Sea Felt Storyboard for Creative Play
- DIY Beach Scene in a Jar with Layers of Sand and Shells
Share Your Creations
If you give this sensory craft a try, I’d love to see it. Share your photos on Pinterest, tag this blog, or leave a review telling us how your child responded. These shared moments of creativity help inspire other parents, educators, and caregivers in our community.