

Meta Description: Dive into this fun DIY guide on how to make a glowing Tissue Paper Jellyfish! Learn how to craft, decorate, and use them with kids or at parties!
Introduction to Tissue Paper Jellyfish Crafts
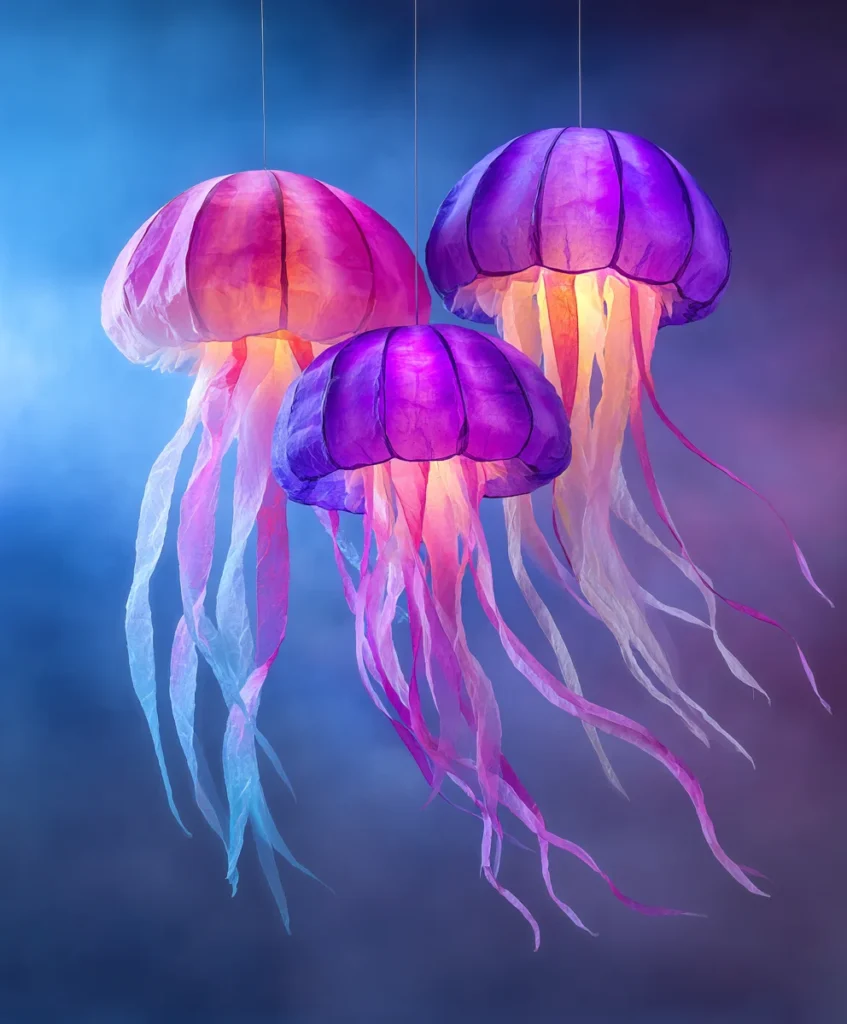
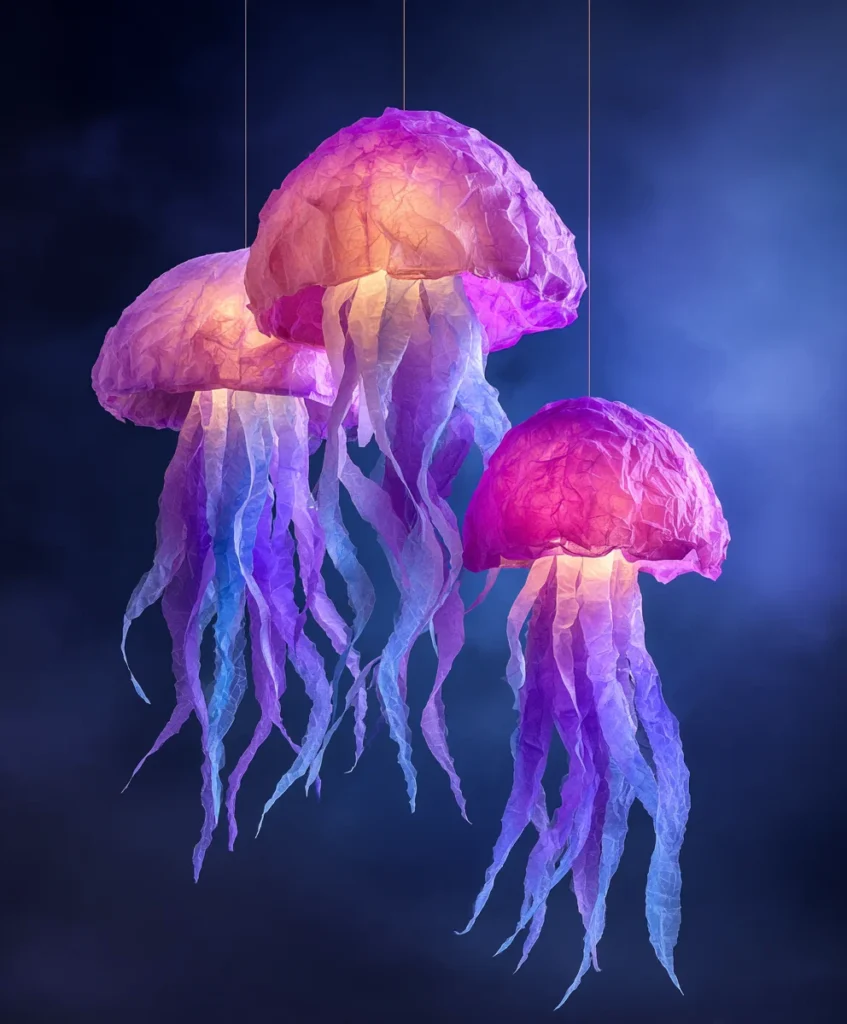
Tissue Paper Jellyfish are the kind of craft that lights up any room—literally and figuratively! With their soft flowing tentacles, vivid colors, and optional glowing lights, they bring a touch of ocean magic indoors. Whether you’re planning an under-the-sea birthday bash, teaching an ocean unit in class, or simply looking for a fun and colorful way to keep the kids engaged on a rainy day, these jellyfish are a perfect fit.
They are budget-friendly, easy to make with household items, and endlessly customizable. Best of all, they offer a chance to mix creativity with science as kids learn about jellyfish anatomy and marine ecosystems along the way.
Materials Needed for Tissue Paper Jellyfish
Before you start floating into fun, gather all the materials you’ll need for this craft.
Common Household Supplies
- Tissue paper (variety of colors for body and tentacles)
- A small round bowl (plastic, paper, or Styrofoam)
- Scissors
- Clear tape or craft glue
- String or yarn (for hanging)
Optional Items for Extra Glow
- Battery-operated LED tea lights
- Glitter glue for sparkle
- Hole puncher (for string placement)
Step-by-Step Guide to Making Tissue Paper Jellyfish
Ready to get crafting? Here’s a full walkthrough to bring your glowing jellyfish to life.
Step 1: Choosing the Right Tissue Paper
Pick bold, ocean-inspired colors like aqua, purple, pink, or even metallic tissue. Layering tissue paper in different hues gives a lovely translucent look.
Step 2: Shaping the Jellyfish Bell
Take your bowl and flip it upside down. Cover it with layers of tissue paper using tape or glue. Crinkle the paper slightly to mimic a natural jellyfish dome.
Step 3: Creating Tentacles with Texture
Cut long strips of tissue paper, about 1-2 inches wide. Curl them gently by wrapping around a pencil or your finger. For added flair, mix in curled ribbon or streamer material.
Step 4: Assembling the Body and Tentacles
Attach the tentacles to the inside rim of the bowl using glue or tape. Let some hang lower than others for a dynamic, flowing effect.
Step 5: Adding a Glowing Light Inside
If using a tea light, tape it to the underside of the bowl before adding the tissue paper. Always ensure it’s a battery-operated LED, not a real flame.
Step 6: Hanging and Display Tips
Punch a small hole in the top of the bowl and thread string through to hang. Hang them from the ceiling in clusters for an ethereal underwater scene!
Educational Benefits of Making a Tissue Paper Jellyfish
Tissue Paper Jellyfish aren’t just fun—they’re educational too!
Develops Fine Motor Skills
Cutting, gluing, and handling tissue paper helps children build dexterity and coordination.
Teaches Color Theory and Ocean Life
Discussing marine animals and experimenting with color blending adds a subtle learning element to the fun.
Creative Ways to Use Tissue Paper Jellyfish
These magical crafts fit into almost any event or learning space!
Party Decor for Under-the-Sea Themes
Use them to decorate birthday parties, school dances, or summer events.
Rainy Day Crafts for Kids
No sun? No problem! This craft is perfect for a cozy indoor afternoon.
Classroom or Homeschool Projects
Incorporate into ocean-themed units or art days for an engaging hands-on lesson.
Safety Tips for Kids Using Tea Lights
Always supervise younger children if lights are involved. Stick with flameless, battery-operated lights only. Check that the light is cool to the touch and fully enclosed.
Eco-Friendly Crafting Tips
Want to keep things green? Here are some tips:
Recycled Materials to Consider
- Use leftover tissue from gift bags
- Upcycle used bowls or cups
Minimizing Waste and Reusing Scraps
Save leftover tissue strips for future crafts or as filler for gifts.
Tissue Paper Jellyfish Variations
Try these spins on the original design:
Mini Jellyfish for Mobiles
Shrink the size and hang several from a mobile frame for a baby room or decor piece.
Giant Jellyfish for Ceiling Decor
Use a large mixing bowl and long crepe paper for a show-stopping party decoration.
Storage and Longevity of Tissue Paper Jellyfish
Store your jellyfish in a dry area and away from direct sunlight to prevent fading. Cover with plastic or tissue when not in use to protect from dust.
FAQs about Tissue Paper Jellyfish
Q1: Can I use crepe paper instead of tissue paper?
Yes, crepe paper adds more texture and is slightly sturdier.
Q2: Are real candles safe for this craft?
No. Only use battery-powered lights to avoid fire risk.
Q3: How long does it take to make one jellyfish?
About 30–45 minutes from start to finish.
Q4: Can I hang these outdoors?
Not recommended unless under cover; wind and rain can damage them.
Q5: Is this suitable for preschoolers?
Yes, with adult supervision for cutting and gluing.
Q6: How do I make it more durable?
Add a second layer of tissue and use a thicker base like a foam bowl.
Conclusion: Dive into Creativity with This Glowing Craft
Making a Tissue Paper Jellyfish is a joyful dive into creativity that combines art, science, and fun. Whether you’re decorating a party, keeping the kids entertained, or crafting for a classroom unit, this glowing jellyfish project is sure to make a splash. With just a few materials and a pinch of imagination, you’ll have your very own magical sea creatures floating in no time!